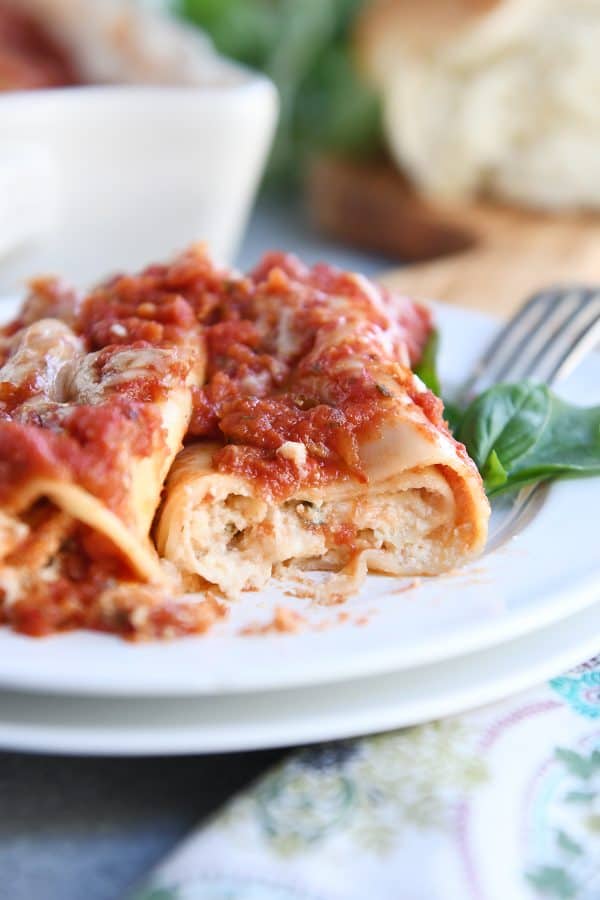
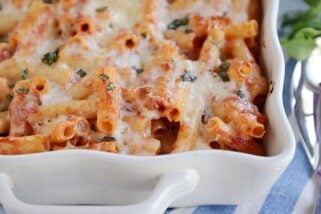
The Best Baked Cheese Manicotti
This amazing baked cheese manicotti has all the deliciousness of traditional manicotti with a much easier way to “stuff” the shells!
I used to think of manicotti as a super fancy (and fussy) way to eat pasta + cheese + sauce. Turns out that manicotti is actually pretty easy to make.
I’ve been making this recipe for years, and it really is the best baked cheese manicotti out there.
The flavors are simple but classic, and it is one of those meals that pleases every single palate in my family. If that isn’t reason enough to rejoice, just wait until you see how easy it is to “stuff” the shells.
It’s brilliant and revolutionary, which basically means baked manicotti just became a meal you’ll want to make very, very often.
Revolutionizing Baked Manicotti
Most recipes for stuffed and baked manicotti call for…yep, you guessed it…manicotti shells. Think: really large tubes of pasta that normally need to be boiled and then precariously stuffed with filling (in my experience, the shells are breaking and tearing and I’m saying lots of bad words and vowing to never make manicotti again).
But this recipe is brilliant because the manicotti is rolled rather than stuffed. This means we need to think outside of the box for the manicotti pasta.
Sheets of no-boil lasagna noodles replace traditional manicotti shells. And I promise, manicotti is better for it.
You want to look for brands of no-boil lasagna noodles that are flat and look like dried pasta. The no-boil lasagna noodles that have ridges and are slightly opaque don’t work as well.
Two brands I like in this recipe: Barilla (in the blue box; pretty easy to find) and Trader Joe’s.
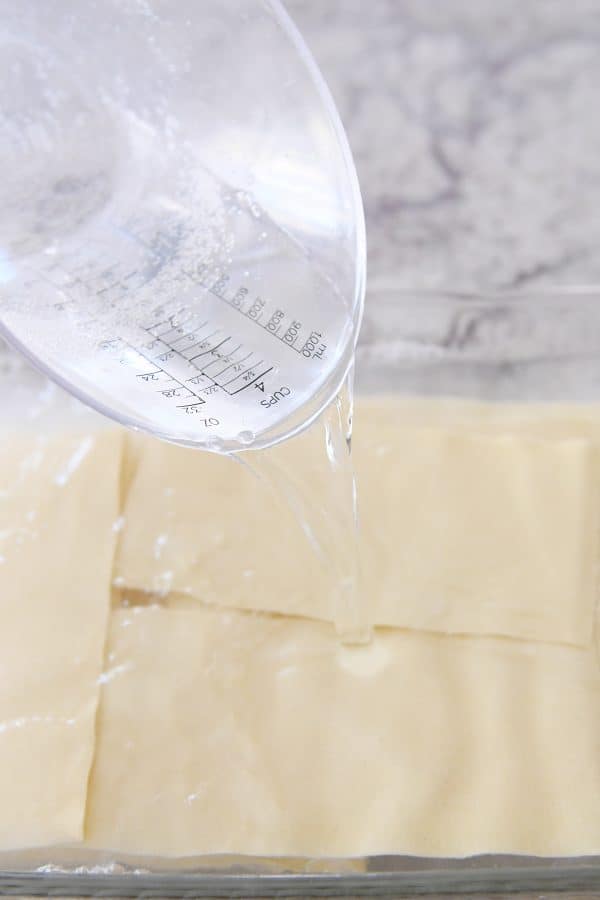
The noodles soak in boiling water in the same pan you’ll bake the shells in (holla!) for just a few minutes until they are soft and pliable.
This makes me very happy because for some reason, as I get older, I am finding myself more and more mentally allergic to boiling lasagna noodles ever again for any type of recipe. I really kind of hate it.
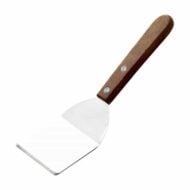
Once the noodles are soft, I place them in a single layer on paper towels (or clean non-terry cloth kitchen towels).
Cheese Filling for Manicotti
The delectable cheese filling is really simple:
- ricotta cheese (this super easy homemade ricotta cheese will change your life)
- Parmesan cheese
- mozzarella cheese
- eggs
- salt + pepper + basil + parsley
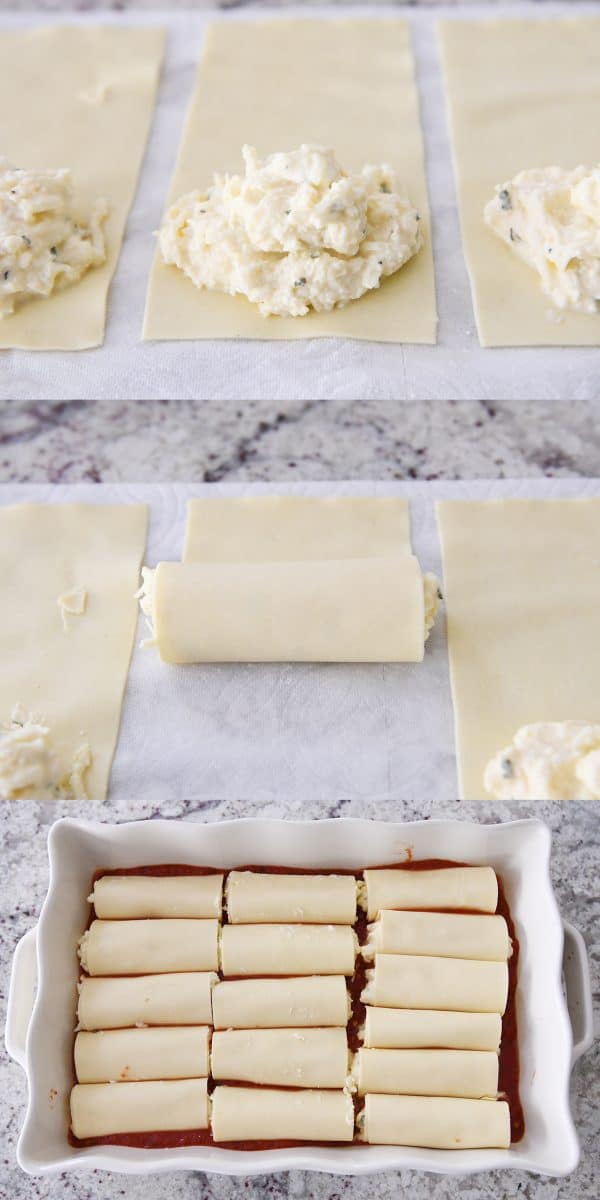
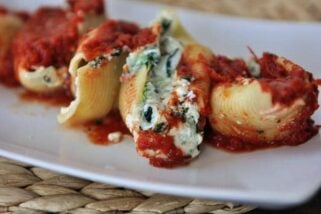
A healthy dollop of the cheese filling goes on the end of each noodle. At this point you have a choice: spread the filling evenly across 3/4 of the rectangle noodle OR leave it in a beautiful lump.
There’s no right or wrong way. I tend to leave it in a mound of cheesy goodness and roll it up that way since it eliminates the step of spreading. Cause some days, gosh darn it, spreading seems hard.
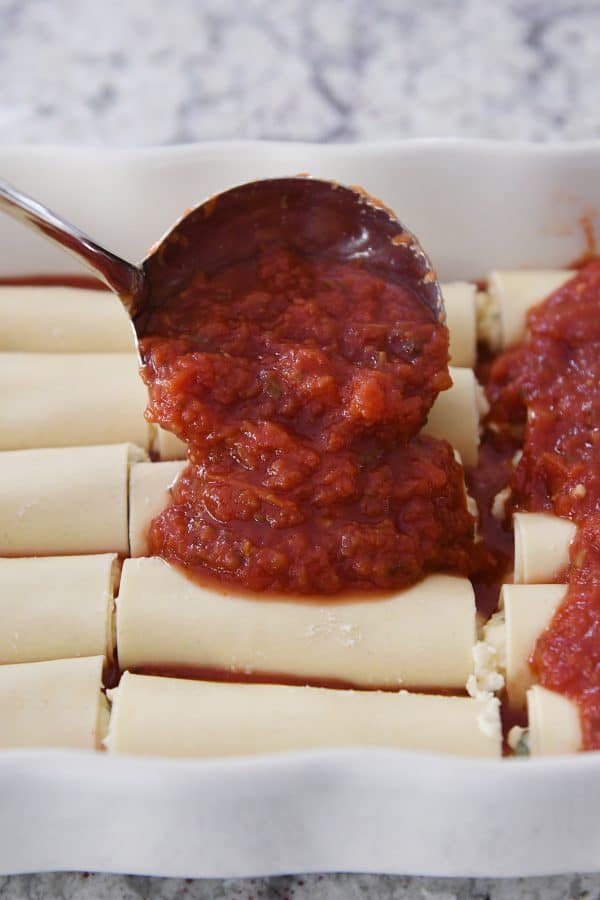
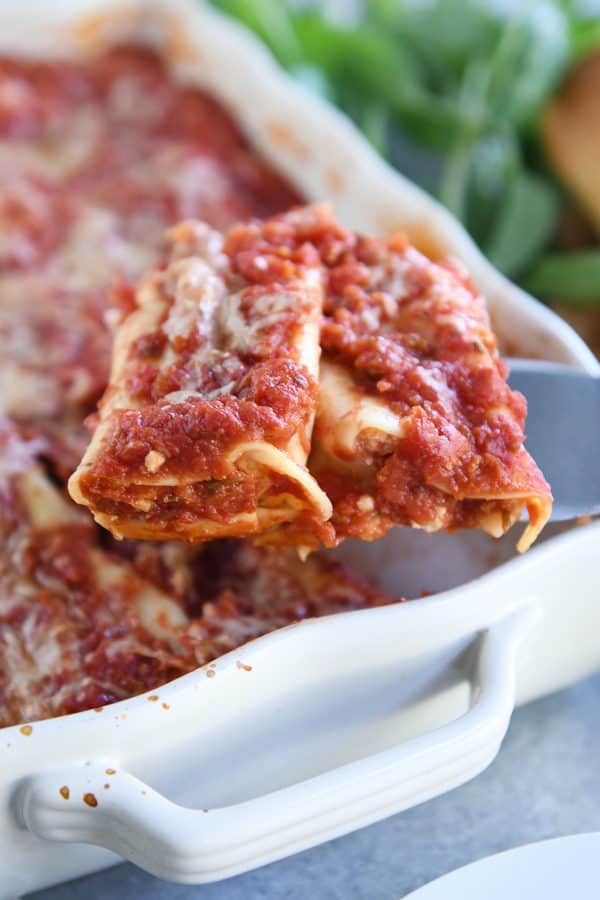
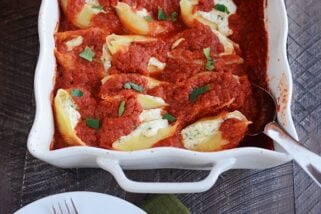
The filled and rolled manicotti shells get neatly placed in the saucy baking dish. And more sauce goes on top.
The sauce is a simple pantry-staple concoction of diced tomatoes, crushed tomatoes, and a few simple seasonings. I very often use all crushed tomatoes since a few of my kids don’t love big, chunky tomatoes. Rude.
A Manicotti Shortcut
Very often, if I have leftover homemade spaghetti sauce (and your favorite jarred pasta sauce would work, too), I use that in place of the sauce “recipe” below. Less work and just as delicious!
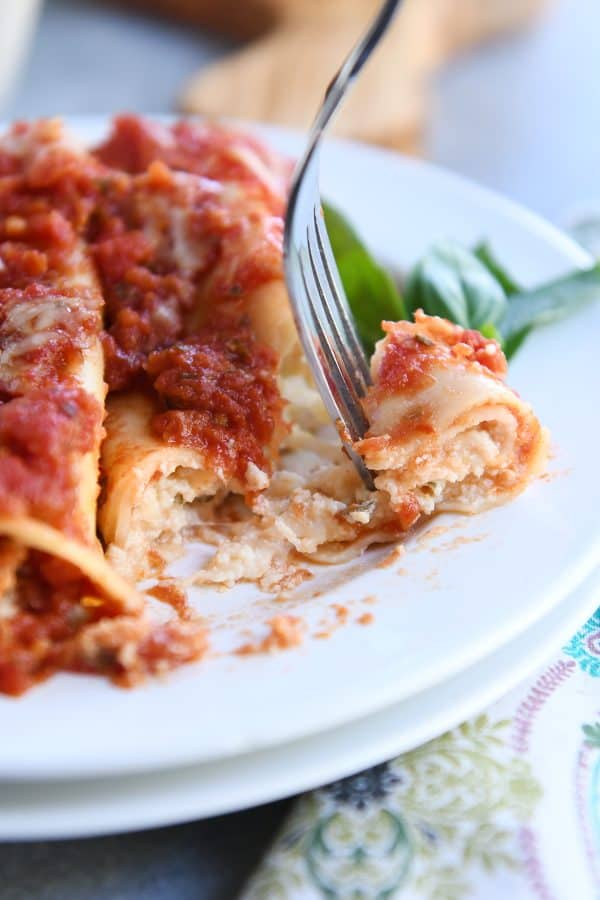
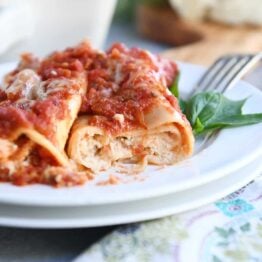
The Best Baked Manicotti
Truly, this baked cheesy manicotti is one of the best meals ever. My family goes crazy for it, easily devouring the entire pan.
Actually, before anyone digs in, I guarantee some child remembered the math to figure out how many manicotti each family member can have.
That’s 2.285 manicotti per person in my household, in case you are wondering. And if you think the kids don’t monitor that precisely, you have no idea who you are dealing with.
This baked manicotti also makes one of my favorite take-in meals AND is a great meatless meal option that is still hearty and satisfying.

FAQs For Best Baked Manicotti
Of course!
It should be the same baking time with 2 pans.
I almost always freeze before baking.
One Year Ago: My Mom’s Famous Freezer Beef and Bean Burritos
Two Years Ago: Small Batch Soft and Fluffy Whole Wheat Bread {Perfect for KitchenAid Mixers}
Three Years Ago: Instant Pot Smoky Honey Cilantro Chicken {Bonus: Slow Cooker Directions}
Four Years Ago: Almond Joy Chocolate Chip Cookies
Five Years Ago: The Best No-Bake Cheesecake
Six Years Ago: Cheesy Chicken Enchilada Stuffed Peppers {With a Slow Cooker Variation}
Seven Years Ago: Cinnamon Roll Cake
Eight Years Ago: Succulent Grilled Pork Tenderloin
Best Baked Manicotti
Ingredients
Tomato Sauce:
- 2 tablespoons olive oil
- 3 medium cloves garlic, finely minced
- ½ teaspoon red pepper flakes, optional
- 1 (28-ounce) can diced tomates, undrained
- 1 (28-ounce) can crushed tomatoes
- 2 teaspoons dried basil
- ½ teaspoon salt
Cheese Filling:
- 3 cups ricotta cheese, part skim or whole milk (see note for homemade)
- 1 cup (114 g) freshly grated Parmesan cheese
- 2 cups (228 g) shredded mozzarella cheese
- 2 large eggs, lightly beaten
- ½ teaspoon table salt
- ½ teaspoon ground black pepper
- 2 tablespoons chopped fresh parsley, or 2 teaspoons dried parsley
- 2 teaspoons chopped fresh basil, or 1 teaspoon dried basil
Noodles + Topping:
- 16 no-boil lasagna noodles (see note)
- ½ cup (57 g) freshly grated Parmesan cheese
Instructions
- Adjust oven rack to middle position and preheat oven to 375 degrees F.
- For the sauce: heat oil, garlic, and pepper flakes (if using) in large saucepan or skillet over medium heat until fragrant but not brown, 1 to 2 minutes. Stir in tomatoes, basil and 1/2 teaspoon salt and simmer until thickened slightly, about 15 minutes.
- For the filling: in a medium bowl, combine ricotta, Parmesan cheese (1 cup), mozzarella cheese, eggs, salt, pepper, parsley and basil; set aside.
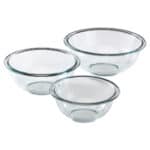
- To assemble: pour 1-2 inches boiling water into a 9X13-inch baking dish. Add the noodles one at a time, alternating directions so they don’t stick. Let the noodles soak until soft enough to roll up, about 5 minutes. Separate the noodles with the tip of a sharp knife to prevent sticking. Remove the noodles from the water and place in a single layer on clean kitchen towels or paper towels. Discard the water in the baking dish and dry the dish to use for assembling and baking the manicotti.
- Spread 1 1/2 cups sauce on the bottom of the baking dish.
- Dollop about 1/4 cup of the cheese mixture on the bottom short side of each noodle. You can either spread the mixture evenly over the bottom 3/4 of the noodle or keep it in a little mound. Roll up the noodle and filling into a tube shape and arrange in the baking dish seam side down. All 16 noodles should easily fit in the 9X13-inch dish.
- Spread the remaining sauce evenly over the noodles so they are completely covered.
- Cover the baking dish with aluminum foil. Bake until the manicotti is bubbling, about 40 minutes. Remove the foil. Sprinkle the manicotti evenly with remaining 1/2 cup Parmesan cheese (add more, if desired). Bake, uncovered, until cheese is browned and bubbly, about 6-7 minutes.
- Remove from the oven and let sit for 10-15 minutes before serving.
Notes
Recommended Products
Recipe Source: adapted from America’s Test Kitchen

I can’t wait to try this tomorrow. I’m pretty eager to try “homemade” versions of things. I gotta be honest, I only had to read the instructions to make my own ricotta cheese and I thought I would die. I can accept that about myself. I’m never, ever, ever going to make my own ricotta cheese. (Hopefully you heard the Taylor Swift song in there.)
Anyhow, thanks for being my hero. You’re amazing! 🤩
Made this tonite but unfortunately it was not a hit with our family. Felt the noodles were doughy and the sauce too acidic. Overall not very flavorful.
Thank you for such a great and easy recipe! I made this with manicotti noodles instead of the no-bake noodles because I’d promised my father in law manicotti and didn’t want to disappoint. The only other change I made was that I added browned ground beef into the sauce after pouring the 1.5c into the baking dish. It was absolutely delicious! The filling was especially yummy! Thank you also for providing notes about making it ahead. I made it earlier in the day and put it in the fridge. Then all I had to do was take it out and bake it. The kitchen was clean for my family and everyone cleaned their kitchen plates. Thank you again!
I make my own noodles
I make my own noodles
Not an option for most. But good for you
I’ve been following this blog for at least 12 years. I think I stumbled upon it when I found the Greek feta dip on Pinterest. I’ve had so many requests for that recipe. It’s so delicious!
I made this one for Christmas Eve. I’ve never made manicotti before. Almost everyone who came stopped me to tell me how delicious the manicotti was. This is a winner for sure! Thank you Mel
I’m so happy to hear that, Jaime! And I’m so honored you have been here for over 12 years. Thank you!
needs more sauce—-double recipe will leave some left for noodle side
Yum! This recipe rocks! It’s so easy. I mean, like stupid easy. I will likely never again make stuffed shells in my life. This is so good and so ridiculously simple. I have to admit that the second time I made it, I was in a super rush and I skipped making my own sauce because I had a 24 oz. jar of marinara on hand and was making half of the recipe) and it worked wonderfully. So nice to know it can be even quicker if I need it to be!
Great recipe
We ALL Love, LOVE, LOVED it!!!! Thanks or the recipe!
We love Italian food and this recipe is delish! Loved using the lasagna noodles and rolling them up. So much easier!
Assembled earlier this morning which made for a stress free dinner hour.
Love recipes you can make ahead.
Thanks Mel!
This is genius! Who would have thought to roll lasagna noodles to make stuffed manicotti? Mel, of course! Thank you so much. I am cooking smarter these days thanks to recipes like this one!
Same exact recipe from America’s Test Kitchen
It’s hard to find manicotti shells where I live, this method is easier and better. I put some olive oil in the water to keep the pasta from sticking.
Although in the end I produced some delicious manicotti, I had a lot of trouble and frustration with the no boil pasta which is why I’m giving the recipe three stars. Though I followed the instructions to criss-cross the lasagna noodles in the boiling water, the pieces stuck together badly and it was impossible to separate them without tearing them (a lot). I’d consider using traditional tube pasta in the future. The cheese filling was delicious. I did make the ricotta, using the recipe given, and it was fun to make and very good, but the store bought ricotta I used (didn’t have quite enough from the recipe) was also good so I wouldn’t hesitate to use it. The cheese on top of the manicotti did not brown though I left the pan in the oven longer than the specified time.
I’ve made this recipe 10x plus. Never an issue with the noodles sticking together. Make sure the water is really hot, and let them sit for 5+ minutes.
I just wanted to know how long to bake the slippery, frustratingly noodles I just managed to somewhat stuff because I forgot the tip I learned last time I made them and that was to stuff them in their dried form and bake them like no bake lasagna, adding more water (or beef broth) so the noodles cook…but I like this idea just as much…I’ve seen lasagna roll ups and this reminds me of them. I will certainly try it next time! Thank you,
Best manicotti in the world. Love making the cheese.
Prepped these yesterday for dinner tonight and they were terrific. I liked rolling them up rather than trying to fill traditional manicotti pasta tubes. The sauce was super easy too. Definitely recommend.
Manicotti is one of our favs! We make ours using crepes instead of pasta, haven’t looked back, not once. Love your style, thank you so much for keeping up with your site.
This is brilliant! So much easier than trying to stuff manicotti shells!
Everyone loved them and it came together really quickly, especially with pasta sauce from a jar.
Awesome! The whole family got involved in making this dish and everyone ate…even the super picky 4 year old!
Hallelujah!
Love, love, love the noodle hack. Using the Barilla noodles is perfect. Yay!
This was awesome! Thank you so much for this recipe Mel. We all loved it. You are correct the cheese filling is delish and making the sauce, not using out of the jar just tops this off. I used Barilla flat sheet oven ready lasagna noodles, so easy and they baked up perfect.
Thanks, Kimbra!
When I made your orange rolls from a few months back, my kids promptly figured out everyone got three rolls each.. same with your cheddar garlic red lobster knock off biscuits lol..your recipes are so good we fight over them !
Haha, same thing happens around here! 🙂
I have a very similiar recipe that adds a box of frozen chopped spinach (wring out the liquid) to the cheese mixture and it is SOOO good! Just a fun variation!
Adding spinach is a great idea!
The BEST!!!! Made it. Loved it. Shared it. What else can I say except thank you, thank you, thank you!!!!!!
Thanks, Cheryl!!
I had lasagna on the menu and wasn’t feeling it. I decided to try the manicotti instead. I am so glad I did–it’s delicious! It even got rave reviews from my mother-in-law, who was visiting. Mel for the win again!!!
So glad you suggested the tip about rolling lasagna noodles instead of manicotti shells. I went to 3 grocery stores and no one has manicotti shells??
Yay!!
This is an interesting method! Can’t wait to try it!
I had a friend make me something like this. She called it “snails.” I’d forgotten about it – I need to make it again! Your version looks delicious!
Haha, I love that nickname for this pasta dish.
This looks fantastic! I have never seen this type of lasagne noodle before, so I looked online at a few of my grocery stores (in Canada). I can get fresh lasagne sheets, or no boil noodles with ridges. Which do you think would work better for this recipe?
Probably the fresh lasagna sheets!
This looks delicious! I make a recipe very similar to this that has chopped pepperoni in the sauce. It’s sooo good and a super easy way to add tons of flavor.
That would definitely boost the flavor!
Another recipe that I have missed. I have a child who literally wants Instant Pot spaghetti or your mom’s lasagna every week and this will help us have another similar dish to appease him. Just like I am still learning wonderful new things about my husband after 23 years, I am still finding new gems here and you keep them coming.
I love hearing that, Sheila! So happy you are here; love seeing your comments.
Well this is genius since the whole reason I avoid making manicotti is because I hate stuffing the noodles. Thanks Mel!
Same, Jackie!
Allergic to boiling lasagna noodles! That made me laugh out loud.
Ha. It’s true!! 🙂
I love this recipe! I used to do the classic manicotti stuff, but I’m converted. It looks a little messier in the pan (I probably always overfill each one a little), but with the toppings on there you can’t even tell… it just looks like a gorgeous spread of deliciousness!
I’m glad you love this one, Brittany!
Thanks for re-posting and reminding me of this delicious dish!! We thoroughly enjoyed it when I made it and it is waaay easier than stuffing the manicotti.
I’m with your kids on this one, I always sub crushed for diced tomatoes lol
I wouldn’t have thought to roll up lasagna noodles for this, great idea!
Please don’t buy or promote Barilla pasta. They are a bigoted company. Google it. Their views hurt a segment of society.
Oh please. This is a food blog. Keep your politics out of it.
I agree. Keep it to food.
You should google them again and see how things have changed since the boycott was first advocated.
I’ve only ever made the cheese filling (I put it in stuffed shells and use my own sauce). Thought you’d be interested to know my family adds Italian sausage (half chicken sausage, half pork, well drained), cooked spinach, and grated zucchini (wrung out) to the cheese mixture. Everyone who has tried it always asks for the recipe, and I direct them here.
Maybe it depends on the grate size of the Parmesan cheese. From “Cook’s Illustrated Grating Cheese Weight and Volume.” Evidently they show both weight and grate size in any of their recipes using grated hard cheeses such as Parmesan or Pecorino Romano.
Grated medium on box grater – 1 ounce hard cheese = 1/3 cup
Grated fine on rasp-style grater – 1 ounce hard cheese = 1/2 cup
Grated coarse on box grater – 1 ounce hard cheese = 1/4 cup
MISTAKE NOTICE: Was trying to decide between this and another manicotti recipe so read through some comments. Quite awhile ago, someone mentioned that the amount of parm cheese does not compute. You can’t have 4 0z. = 2 cups. I didn’t even catch the mistake until someone else said it. Putting it back at the top of the comments so hopefully someone will catch it if making it!
Ready to pop in oven but have two pans. Time at 375? Can’t wait nor can my family. Need leftovers too
Should be about the same baking time even with two pans.
Mel,
Thank you for this delicious recipe. I made the manicotti three times, the first two per your recipe, except used my own sauce for convenience and substituted regular lasagna noodles (Barilla) I soak in hot water about 45 minutes or until pliable, drain and pat dry and fill (preferring the flavor and texture) – baking time approximately 40-45 minutes @ 375 degrees.
The third time I made a variation, adding fresh cooked spinach (approximately 3/4 cup well drained, chopped) and one pound cooked sweet sausage, crumbled into cheese mixture after cooled. Delish! The flavors are balanced and lives up to its name – Best Baked Manicotti as many compliments from our guests.
That variation sounds delicious, Kathy!
This recipe is fantastic! Took a bit longer to prepare the first time and I didn’t roll the manicotti tight enough (had four left out of the pan but put them into another pan) but the recipe was easy and absolutely scrumptious! My hubby said to put it into my ‘keeper’ recipes. Even my neighbors loved it … we ‘trade’ lots of food. I’m going to make the chowder and then the sweet/sour chicken next. I think I’ve found the guru of recipes and I love the little notes and modifications Mel makes. Will recommend ALL her recipes … can’t wait to get to the brookies (diet preventing me right now).
Thank you so much!!
We have been having stuffed manicotti for years as part of our Christmas Eve family tradition. About five years ago the job fell to me to make the main course for dinner… the manicotti of course. So in an effort to make the best meatless dish I could find (In Catholic tradition we abstain from meat on Christmas Eve) I scoured the internet and came upon this recipe. (I do have a different sauce recipe that I use… similar, but it’s my own!) We absolutely love this recipe. It is so easy to use the lasagna noodles, and the cheese stuffing is so good! I come back here every year because I always forget to print the recipe… hopefully one day I will, but until then, Mel, please don’t go away!!
Thank you so much, Jim!
Followed the recipe exactly. It was delicious!
I see a mistake above, which would explain the complaint about the parmesan. You have it listed as 4 oz parm, or 2 cups. That should be 1/2 cup!!!