Strawberry Rhubarb Pie
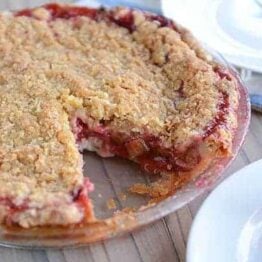
This best-ever strawberry rhubarb pie is filled to brimming with juicy, sweet strawberries, tart rhubarb, and the most delectable, buttery streusel topping. It’s my favorite summer pie!
I wait for rhubarb season all year long just to make this pie. There is no question about it being my most favorite summer pie by a landslide.
No competition.
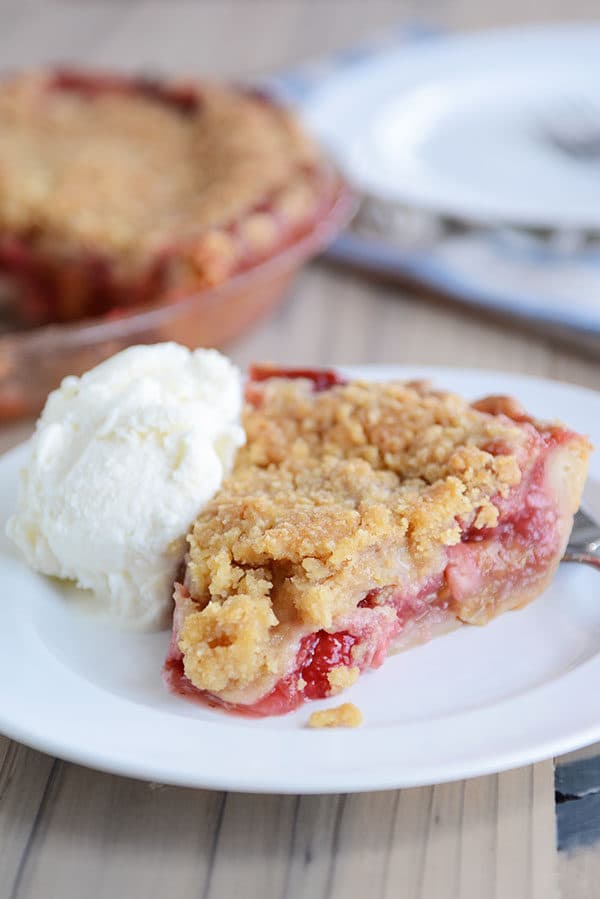
Rhubarb is Underrated
I have a few favorite rhubarb recipes that foster my rhubarb obsession:
This Rhubarb Streusel Cake with Warm Vanilla Sauce is insanely delicious (have you made it?).
And these Brown Sugar Rhubarb Muffins are tasty, tasty.
But by far, my most favorite thing to make with fresh rhubarb is this strawberry rhubarb pie.
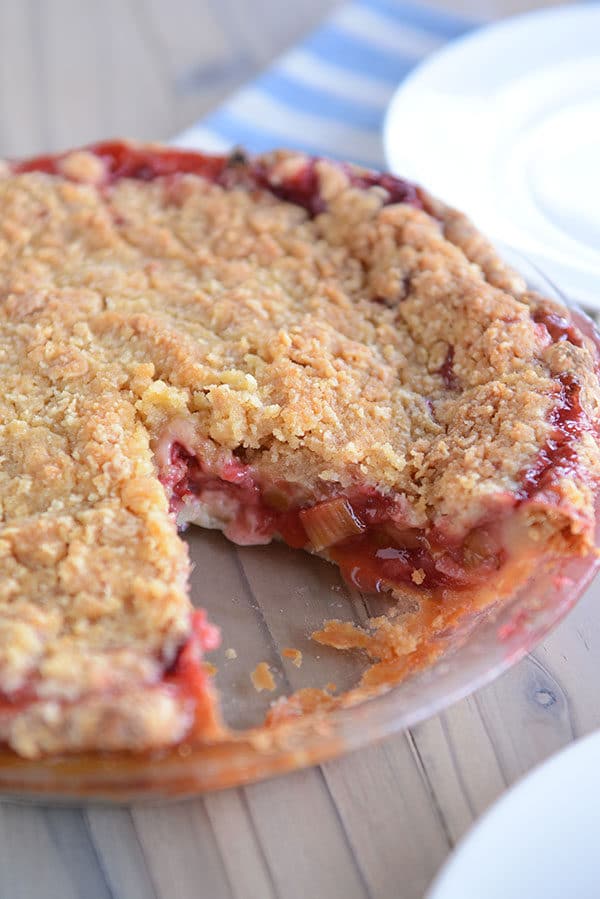
Perfect Strawberry Rhubarb Pie
Filled to brimming with juicy, sweet strawberries and tart rhubarb, it is uncomplicated and perfect.
And that buttery streusel topping is the perfect compliment to the sweet/tart filling. Plus, it means you don’t have to bother with rolling out a pie crust for the top.
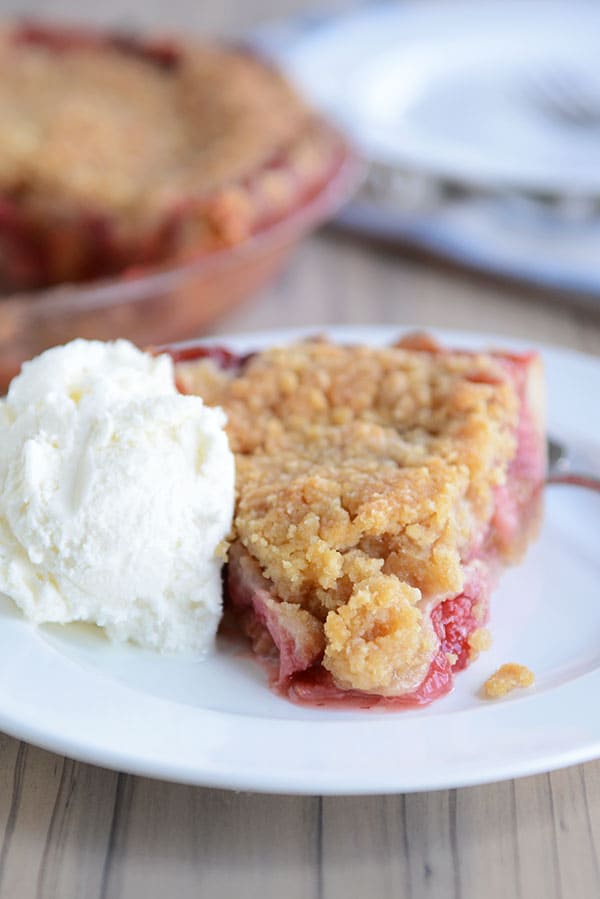
Speaking of Pie Crust
As you may notice from the recipe, you’ll need an unbaked, 9-inch pie crust for this delectable pie. Storebought, homemade – don’t stress too much about the pie crust.
It’s just a simple vehicle to the amazing strawberry rhubarb filling. No need to bake it first! It’ll bake in the oven with the fruit filling.
Here are two of my favorite homemade pie crusts:
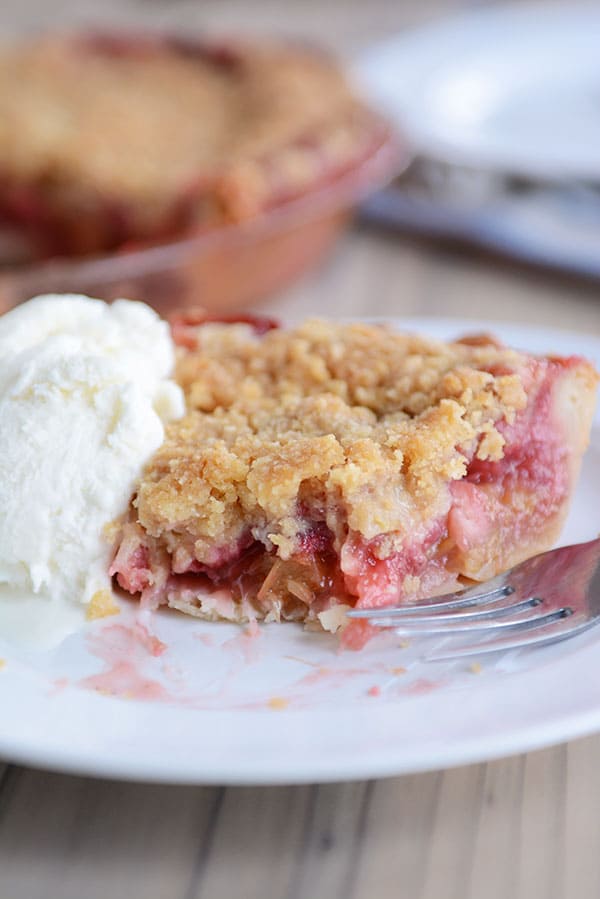
This strawberry rhubarb pie is a classic, and it has been one of our favorite pies for more than ten years. Tried-and-true, it’s a recipe that will be passed down from generation to generation!
And it’s one of the main reasons I battle a behemoth rhubarb plant year after year. Best pie ever!
Also, here are a few of my most-used pie making supplies:
Disclaimer: Amazon affiliate links listed below.
-This 9-inch pie plate is functional, inexpensive, durable and wonderful. I’ve had mine for at least a decade, if not longer.
-Pie server = not optional. This is the one I have and I love it.
-I have this pastry cloth/board for rolling out pie crusts (I got it years ago in Minnesota when I was learning how to make lefse), and honestly, it has changed my pie-making game. It makes rolling out pie crusts so foolproof. I love it and can’t recommend it enough.
-Fave rolling pin right here. Nothing fancy – all function.
And for more details on making perfect pies at home, check out my Pie Boot Camp Series HERE! The series includes:
All About Pie Making Equipment Essentials
How to Make Pie Crust (Foolproof Recipe, Rolling Out, Crimping + Video Tutorial)
All About Blind Baking + How to Do It and Why (Bonus: Chocolate Ganache Cream Pie Recipe)
Double Crust Pies and How to Make an Easy Lattice Crust (Bonus: Printable for Easy Reference to Sum Up Pie Boot Camp)
One Year Ago: Summer Roasted Vegetable Orzo Salad with Fresh Basil
Two Years Ago: Little Lemonies (Lemon Brownies)
Three Years Ago: No-Bake Chocolate Granola Bites
Strawberry Rhubarb Pie
Ingredients
- Single crust pie dough (see note)
Filling:
- 2 ¾ to 3 cups (340-455 g) sliced rhubarb about 1/4-inch thick, about 5-6 medium stalks
- 2 cups (about 455 g) sliced strawberries
- ⅔ cup (141 g) granulated sugar
- 3 tablespoons (28 g) cornstarch
Streusel Topping:
- 1 cup (142 g) all-purpose flour
- ½ cup (106 g) brown sugar
- ½ cup (113 g) cold butter, cut into tablespoon-size pieces
Instructions
- In a large bowl, combine the rhubarb, strawberries, sugar and cornstarch. Mix well. The mixture will start to turn thick and syrupy as it is stirred.
- Roll out the pie crust and place in a 9-inch pie plate, trimming and fluting the edges.
- Pour the strawberry/rhubarb mixture evenly in the crust.
- In a small bowl, combine the flour and brown sugar.
- Add the butter, and using a pastry cutter or two knives, cut in the butter to the flour/sugar mixture until it has the consistency of coarse crumbs.
- Sprinkle the streusel topping evenly over the top of the pie (but not covering the edges of the pie crust).
- Place the pie on a rimmed baking sheet (in case any of the filling bubbles out), and bake at 375 degrees for 50-55 minutes (see note for time edit – over the years, I’ve started baking this pie for 75-90 minutes so it’s fully set up and not runny), until the streusel is golden and the filling is bubbling and hot. Cover the pie crust edges halfway with foil or a pie crust shield to prevent over-browning, if needed.
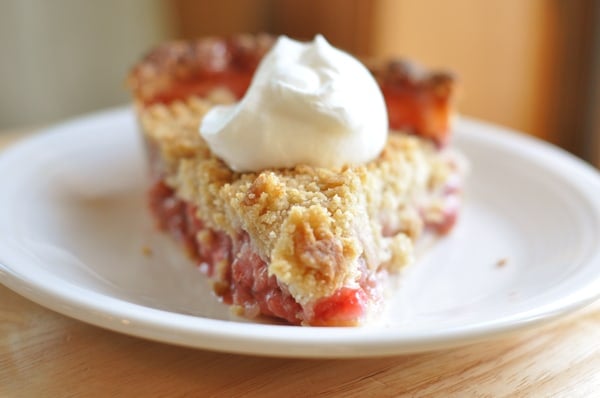
- Let the pie cool completely before cutting (the filling will thicken as it cools). Serve with a scoop of vanilla ice cream or sweetened, whipped cream, if desired!
Notes
Recommended Products
Recipe Source: Mel’s Kitchen Cafe
Recipe originally published May 2010; updated with new photos, commentary and recipe notes.
—————————————-
Update: this pie crust recipe (below) was included in the original post for Strawberry Rhubarb Pie seven years ago. Over the years, I’ve come to rely on this no-fail pie crust as my favorite, go-to pie crust, but I’ll leave the following recipe listed in this post in case anyone still uses it (don’t want anyone panicking over a lost recipe!).
No-Chill All-Butter Pie Crust
adapted slightly from Jen K.
*Note: this pie crust makes for a sweeter-than-normal pie crust. If you want more of a traditional pie crust, since they aren’t known for being overly sweet, decrease the sugar by half.
*Makes 2 pie crusts (for 2 single pies or 1 double crust pie)
1 cup (2 sticks) very cold butter (I cut my butter into about 16 small pieces, put them on a plate and place the plate in the freezer for about 15 minutes before using in the recipe)
2 cups all-purpose flour
1/4 cup sugar
1/4 teaspoon salt
1/4 cup very cold water, plus an additional tablespoon or two if needed
In a food processor or stand mixer fitted with the paddle attachment (or in a large bowl, if mixing the dough by hand), combine the flour, sugar, and salt. Mix for a second or two to blend. Add the butter and, on low speed (or by hand with two knives or a pastry cutter), work the mixture until it is crumbly and the largest pieces of butter are no bigger than a pea. The butter should remain cold and firm. If the butter is becoming too soft, refrigerate the mixture for a 10-15 before continuing. Once the butter/flour mixture resembles large coarse crumbs, on low speed (or tossing with a fork, if mixing by hand), sprinkle the 1/4 cup cold water evenly over the flour mixture, and mix just until it pulls together in a shaggy mass. Add a tablespoon of cold water additionally at a time if the dough isn’t pulling together well. The object isn’t to have a smooth, tight ball of dough – the dough should still have loose pieces of flour here and there but should just start coming together when the water is mixed in.
Dump the dough out onto a work surface. Using your hands, pull the dough together and gently press it into a large ball. It should start joining more cohesively and forming more of a dough-like consistency. Separate the dough in to two pieces. Set one piece aside and gently cover while working with the other.
Using a lightly floured work surface (a roul’pat works great here!), begin rolling from the center of the dough outward. Stop the pressure 1/4 inch from the edge of the dough. Lift the dough and turn by a quarter and repeat the rolling until the dough is at least 12 inches in diameter. The lifting and turning is important because this will let you know if the dough is sticking and if more flour is needed on your work surface.
Carefully fold the dough into quarters and place in the pie dish (or roll up on your rolling pin and gently unroll in the pie dish). Ease the dough into the bottom and up the sides of the pie dish without stretching (if the dough is stretched to fit the pie plate, it will shrink while baking). Using kitchen shears or a sharp knife, trim the excess dough around the edge of the pie plate so that there is still about 1/4 to 1/2-inch hanging over the edge of the pie plate. Fold this excess under the edge of the pie to form an extra thick edge on top of the pie plate rim. Flute the edges with your fingers. Cover the pie plate loosely with plastic wrap and refrigerate for at least 15 minutes or up to overnight before filling and baking. Repeat with the second half of the pie dough.

I want to make this pie but I can’t find rhubarb anywhere. Can I make it with just strawberries?
I think so, but you’d want to reduce the sugar since you won’t have the tart rhubarb.
Even when strawberries and rhubarb are out of season, I use your streusel recipe for other pies. It’s the best.
Does this need to be refrigerated afterwards? I’m wanting to make it and mail it to someone…
Yes, if it is going to be more than 12 hours, it should be refrigerated.
Excellent! I made this for company and was told it was the best straw rhubarb pie they’d ever had! I have to agree.
Do you use salted or unsalted butter for the topping?
I use salted butter
My pie was runny and did not thicken w the corn starch but it tastes fantastic, it’s just the presentation was not great… Where did I go wrong
Hi Coco, usually if the pie doesn’t thicken well, it either needs more time in the oven (if the top of the pie is browning, tent with foil…but baking it fully is really important until you see thick bubbles oozing in the filling) or more time to cool.
Yup, Mom & all loved it! Thanks for the recipe! Now that I’ve made this pie–using your recommended measures–the only other change I will make at the next baking opportunity, is to reduce the sugar.
This one’s a keeper 😄
Hi! It’s great to find your website.
Most of my family members are eating gluten free, dairy free & corn-less. (But can tolerate grass-fed butter)
So, I decided to tweek this recipe because my mother loves rhubarb pie, and I’ve never made a rhubarb/strawb. pie with streusel.
Made a spelt flour pie crust out of flour, avocado oil & coconut milk. In the filling, I used arrowroot flour instead of corn starch & coconut sugar.
For streusel, I used cassava flour & regenerative organic light brown sugar with unsalted grass fed butter.
It baked well @ 375 degrees for 45 mins. I covered the sides of crust right at entry to oven. And after 20 min., covered the top with foil b/c streusel was browning.
Will be driving to see Mom soon. Will wait to cut into it until present with her.
Will report back in a few days 😊
This is such an easy and fantastic recipe. Definitely takes longer to prep than instructions say so be aware of that (rhubarb is tough to cut!)
This was my first attempt at making strawberry rhubarb pie and boy am I happy I picked this recipe! It turned out amazingly and I got some positive feedback…“This is magic” “Oh my goodness you should make this pie for a living” “This is perfect and so delicious” and “I wanted to just taste it but then I couldn’t stop eating”
I’m about to make the Strawberry Rhubarb pie,will let you know how it turns out.
Do you thaw or just add frozen rhubarb to this pie and then bake? Thank you .
You can use fresh rhubarb or frozen rhubarb (I recommend thawing the rhubarb and patting dry before using).
I added cinnamon to the topping and extra sugar to the rhubarb. My teenage son who never likes new things ate the whole pie! He asked me to make it again.Thank you for sharing your recipe. This is a keeper.
Very good I’m allergic to strawberries but made it for everyone else omg it smells like heaven! Used oats in place of flour it’s what I had. Big hit 😊 ty
Amazing recipe!! I made this recipe for a pie contest and won first prize!! I adjusted the recipe a bit by adding homemade pie crust to the top as well, and adding a bit of cinnamon, vanilla and brown sugar to the pie. I never got to try it, but heard it was delicious! Thank you for the awesome recipe! ♥️
Yay! Congratulations!!
Great receipe. Love that I can make a crumble top instead pie top
I made this pie and like the receipe and easy
Thank you
I made 2 of these pies exactly as directed and they turned out perfect! My question is, can I bake and freeze for winter? Thank you!
Hi Valerie, I’ve never tried that but as long as the pie is fully baked and cooled, I think it should work just fine!
Valerie, I froze one before baking and baked it from frozen and it turned out perfect! Just add an extra 10 minutes or so to the baking time.
I went strawberry picking, have rhubarb growing in my yard and had some left over frozen pie dough (enough for just one pie shell) and found your recipe when I Googled one pie shell strawberry rhubarb pie. It’s absolutely delicious. I was thinking some cinnamon would be a great addition, but honestly I’m glad I didn’t use it. The pie’s feature is just tasting the fruit with the pastry in the background, which makes it simple and perfect. I made mine with gluten free flour and turned out amazing.
Fabulous. My mom and I made this today with fresh rhubarb and strawberries. The struesel on top is just absolutely outstanding. Thanks!
Served this Sunday at a church potluck along with other deserts. Mine was gone first, and they were looking for more! Great recipe and I didn’t change a thing. Thank you. Baked it 80 min.
I cannot get behind the comment don’t worry about using a store bought pie crust. The crust is just as essential as the filling for me.
Normally I’m totally against reviewing when I’ve altered a recipe but I did it this time out of necessity and it was so good I HAD to review.
So the slight changes. I used 2 to 2.25 cups of rhubarb. My frozen rhubarb decreased after freezing then thawing. So instead of taking out another 2 cup package I increased the amount of strawberries to 2.25 cups? These are approximate. I don’t feel this would have changed the recipe drastically. Perhaps decreased the tartness a tiny bit. I did bake at 375 for 60 min, then checked it, added another 10 minutes, checked it then added 10 minutes once more. As the notes state it allows the filling to thicken. Worked perfectly. This recipe was AMAZING!!! I would give it more stars if I could. Probably the best strawberry rhubarb pie I’ve ever had. Such a great recipe!!!
This IS the perfect Strawberry Rhubarb pie! It was my dad’s favorite and he would have loved it. My hubby loves it too!
I loved this recipe. It was super easy to make and tasted great. I couldn’t find fresh or frozen rhubarb, so I used canned. Definitely lost some of the tartness using that, but it was fine in a pinch. I can’t wait to try this again once our stores have fresh rhubarb in stock!
Way too damn tart !!! If you want this to be something edible ask add at least half a cup of sugar to a cup of sugar to the guts of the pie itself Very disappointed Don’t make this pie folks unless you add more sugar … !!!
I ended up not having enough rhubarb and didn’t want to thaw more from my freezer so I slightly altered to accomodate the amounts. So I did about 2 to 2.25 cups of rhubarb and 2.25 cups of strawberries. If you reduce the rhubarb and increase the strawberries it will be less tart for you. Give it a try!
Since it’s no longer rhubarb season can I buy a bag of frozen rhubarb and will it taste just as good as fresh in the pie?
Frozen rhubarb should work just fine!
Thank you Mel! I entered this pie recipe, but made a lattice top, in my local county fair this month and won a BLUE RIBBON First Place for the best two crust pie! Yummy!!!! Thank you for all your delicious recipes!
Oh my goodness, congratulations!!
I knew nothing about rhubarb beyond its color, shape and that it goes into Strawberry Rhubarb Pie. OMG, it is so delicious that I’ve made this recipe twice this month already. Look no further, THIS is the recipe you want.
Wow! This pie is delicious! A new favorite–thanks for another winner, Mel!
This was most delicious ending to Father’s Day! Thank you!
I want to give you 10 stars if I could for this most delicious version of a classic. I’m not a fan of cinnamon and this recipe is just perfect without it. I used ready made tender flake crust and it took less than 10 min to put together. The filling was too much for one crust and i split it evenly between 2 crusts. The topping was also split between the two. This recipe is officially a family favorite for my family and shared the 2nd one with friends who also loved it. Thanks for sharing.
This pie is so good. Everything came out perfect.
Thank you for sharing this recipe. It was delicious and easy to make. My Mom and brother-in-law thought it was delicious also. I printed the recipe so I can make it again.
I make this delicious pie every spring as soon as my rhubarb Is ready from my garden. It is my family’s favorite. It is our go to recipe! Thanks for sharing. Love your recipes.
Reviews by friends include:
“One of the best pies I’ve ever had!”
“Pro-level!”
“Best pie ever!”
Absolutely loved this pie. Making two more with the rhubarb from my farm share this week.
Hands down the best pie recipe on the face of planet Earth!!! Omg soooo good. 5 Stars +
It was my first attempt at making this and the complete pie (be it with a different filling, I had too many plums which I softened first) and a pot of cherries which was nearing it’s expiry date and it all turned in a most delicious crumble. I think the next time I make it, I’ll just pre-bake the bottom for about 8 minutes, as that could’ve been a bit more done. But overall, I, my husband, my neighbours and someone who walked in for a chat, thoroughly enjoyed this effort. Thank you for sharing.
Hi Mel,
I am going to make this pie tonight to freeze and eat in a couple weeks when all my kids are home. My question is, how long would l cook it for if frozen, or should I let it thaw overnight in the fridge before re-baking it? I’ll be baking it tonight and letting it cool completely before freezing. Thanks so much!
I think I’d probably bake from frozen (I think it might get kind of watery if you thaw before baking).
I made this by request from a 93 year old Korean War veteran, using the rhubarb from his garden and fresh picked strawberries from our local strawberry farm. I’m told it was absolutely delicious from both he and his son and it was gone the very next day. I did switch out the sugar using tuvia substitute due to diabetes status (another first) neither man noticed the difference. Thank you for this easy to follow recipe. Now to make one for myself
This is absolutely the best strawberry rhubarb pie! 5 stars plus more!