Easy Rustic Crusty Bread with Tutorial {No Mixer, No Kneading}
This homemade rustic crusty bread is the most delicious bread that will ever come out of your oven! No kneading or a stand mixer required!
This is the bread recipe that can change your life. I’m serious. Just scroll down and read through the comments and then you’ll believe me. Here are a couple comments among hundreds of rave reviews:
One of the best bread recipes I have ever made! A real favorite with my family and excellent for sandwiches. Super easy!
I made this recipe for the first time this past weekend and it turned out perfect! It truly was an incredibly easy recipe to follow.
This is the first bread recipe i’ve ever successfully made! It’s delicious and so easy I used active dry yeast, and the working with yeast tutorial was a huge help! great recipe, Mel.
This rustic crusty bread recipe is perfect for beginning and expert bread makers alike. It’s like a perfect loaf you’d get right out of a bakery – for a fraction of the cost. Many artisan-type loaves of bread like this take days to make, but this bread recipe only takes a few hours!
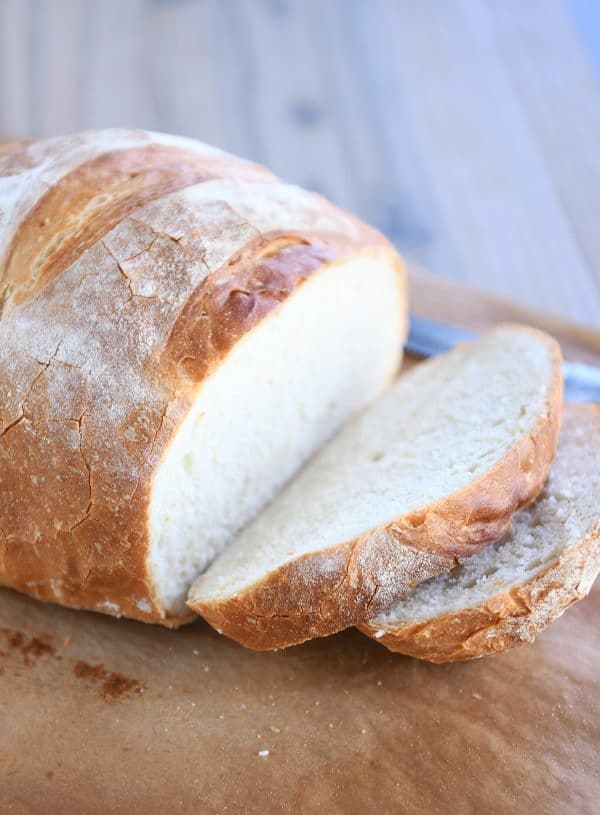
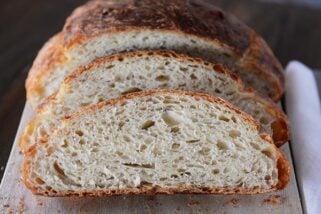
And you won’t believe how easy it is. Not only is it no-knead, but you don’t need a stand mixer, electric mixer or any kind of mixer to make it. Just a bowl and a spoon. From start to finish, it is ready to bake in about 2-3 hours. The crust is golden, thin and crunchy, and the crumb is tender and soft.
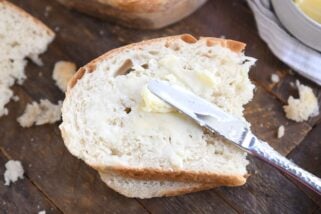
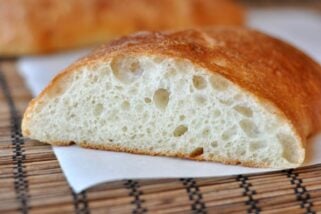
It doesn’t have the airy holes of a no-knead type bread, the crumb is tighter and slightly more dense, but it is glorious for paninis, garlic bread or just served plain (think: tear off chunks as you go!) with a wide variety of meals.
The recipe makes between two and four loaves, depending on how big you want to make them. I usually make two bigger loaves out of the batch, and I like to bake up both loaves the same day and pop one in the freezer for easy access next time we get the hankering for delicious, crusty bread.
How to Make Rustic Crusty Bread
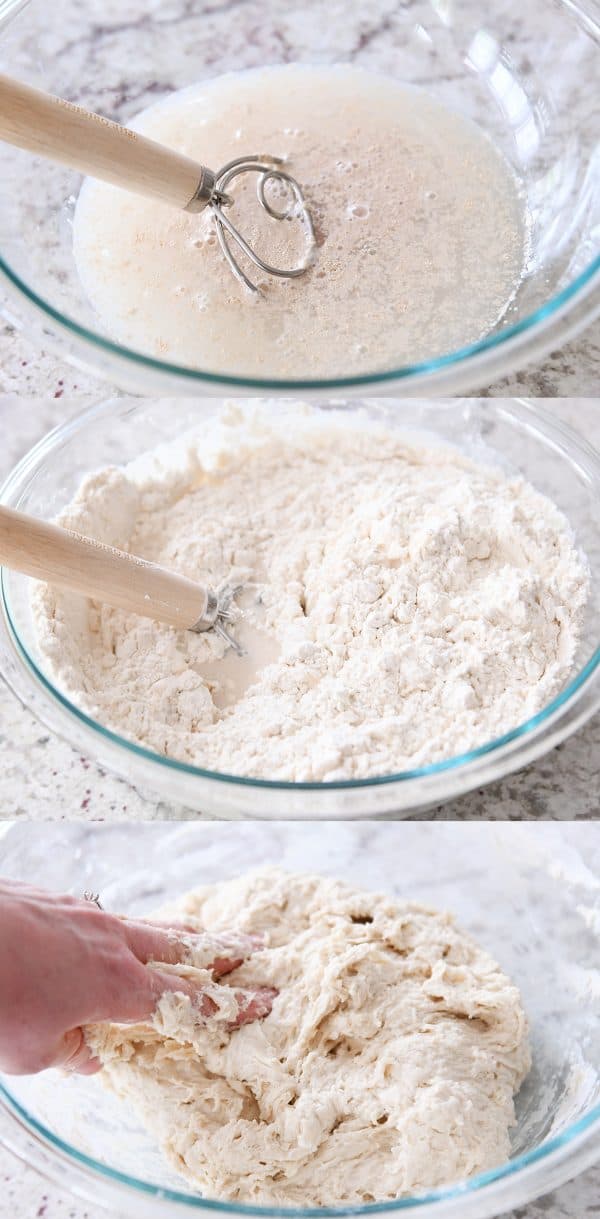
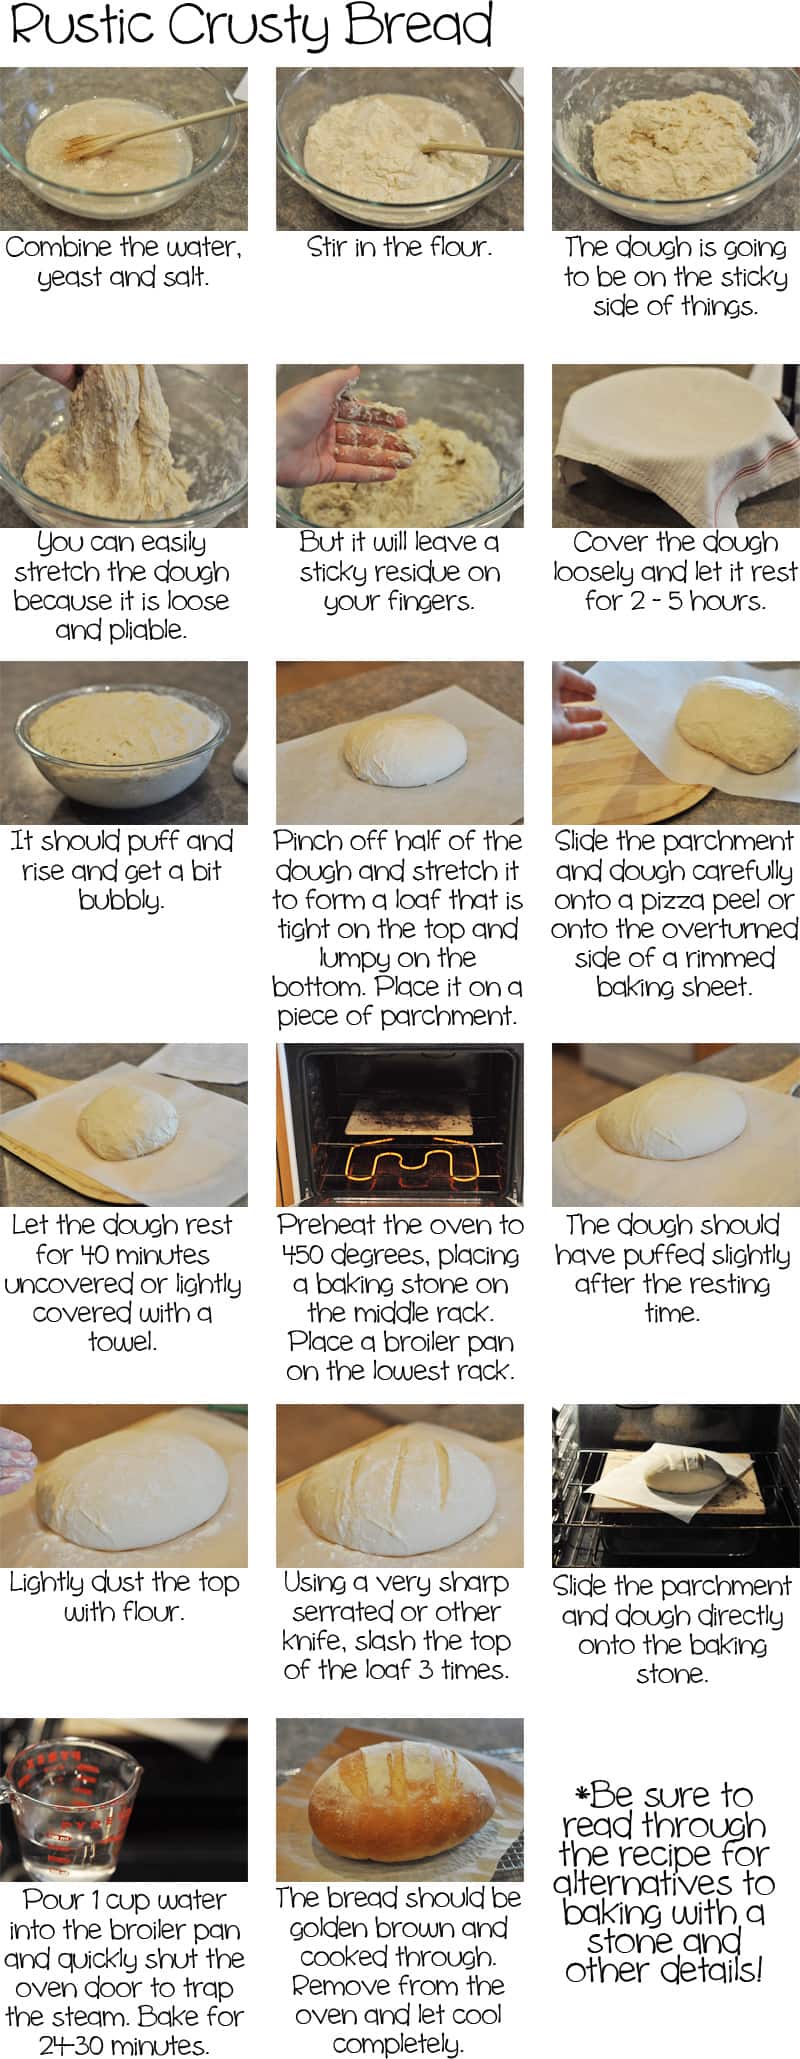
In a large bowl, combine the water, yeast and salt. Give it a little mix. And then add in the flour. Make sure to measure the flour with a light hand (or use the weight measure). You can mix with a spoon or spatula; I have been converted to the wonders of this Danish dough hook {aff. link}, but eventually with this dough, I get in there with my hands and mix it up the rest of the way.
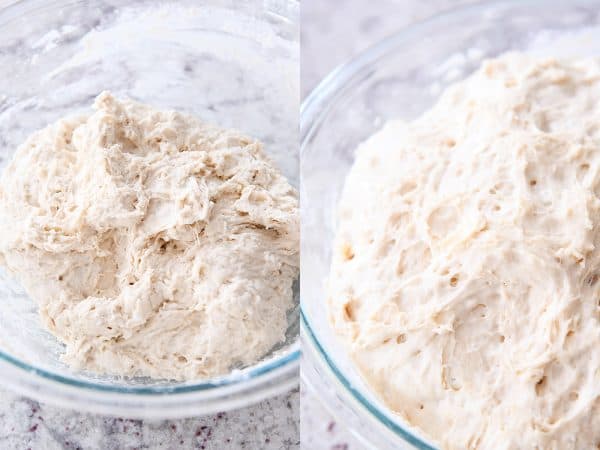
The texture of the dough will be shaggy and much softer and stickier than a traditional kneaded bread dough. Make sure there are no pockets of flour and the dough is well mixed.
Cover the dough right in the bowl and let it rise until puffy and doubled.
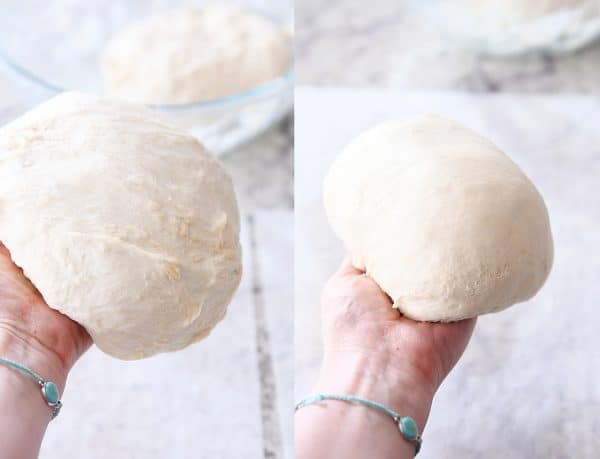
At this point, to shape into loaves, I grease my hands really well with cooking spray and split the dough into two pieces (you can make four smaller loaves out of the batch, if desired). Take one of the pieces and work it in your hands, turning the edges underneath until it’s a relatively tight, smooth loaf. Regrease your hands if the dough is super sticky.
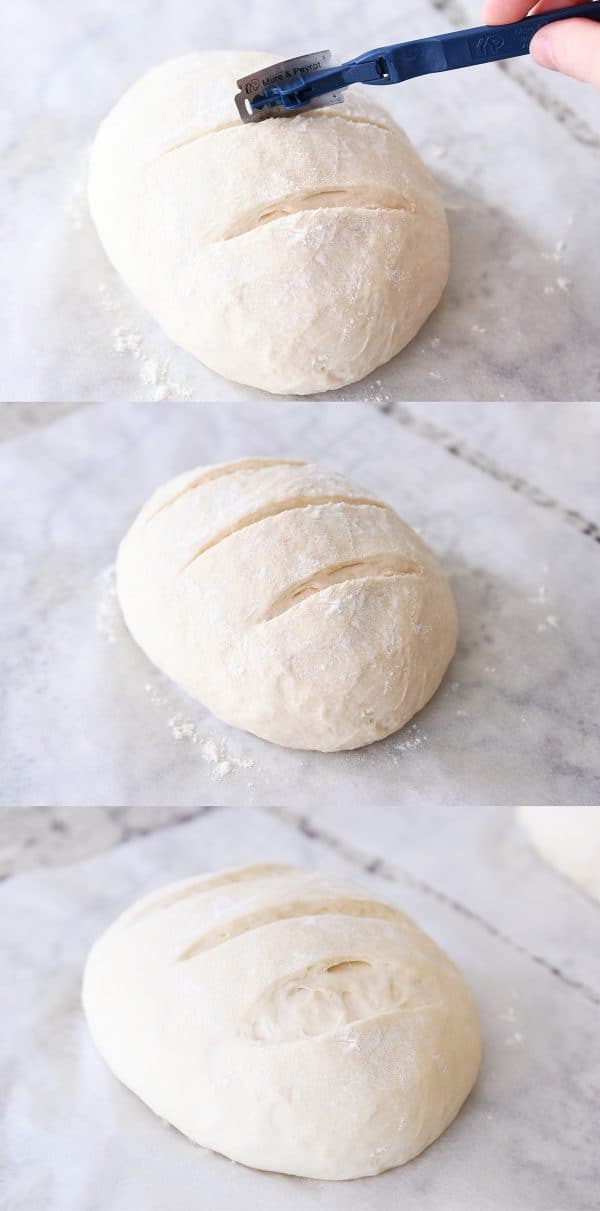
Place each loaf in the center of a piece of parchment paper and dust the top lightly with flour. Using a baker’s lame {aff. link}, razor, or really sharp knife, slash the dough 3-4 times on top, about 1/2-inch deep or so.
When I originally posted this recipe, I waited to slash the dough until after it had risen, but this sometimes causes the dough to deflate completely (especially if you don’t have a really sharp razor or knife), so I’ve started doing the slash action before it rises. Haven’t looked back. Works great and you still get the definitive, pretty “decoration” on top of the loaf as it bakes.
Cover the dough and let it rise until puffy (it won’t necessarily double in size).
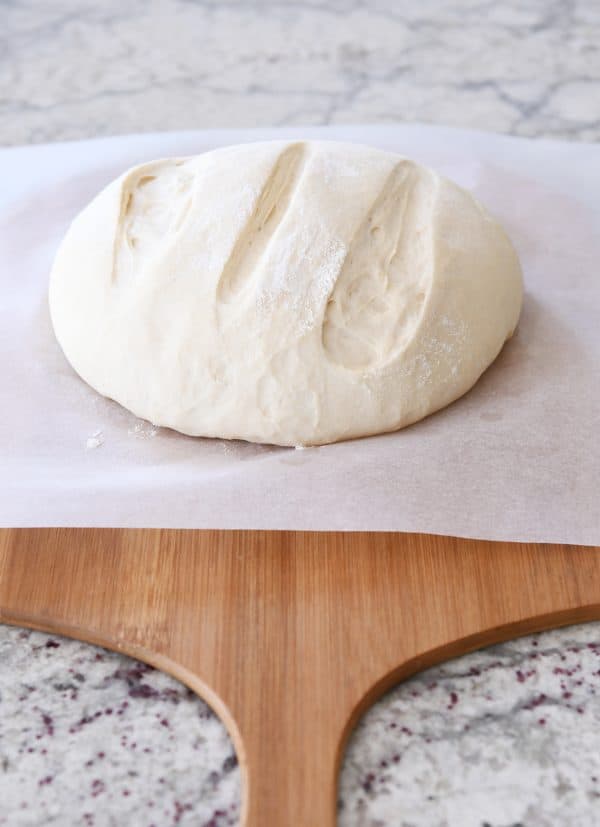
Carefully slide the parchment with the loaf on top onto a baking/pizza peel {aff. link}. I suppose now is the time to mention that you want to preheat a baking stone {aff. link} in the oven to 450 degrees F and let it preheat at that temp for 20-30 minutes before baking the bread. If you don’t have a baking stone, you can try preheating an overturned aluminum baking sheet (although it may warp and bend out of shape a little at that temp, so be careful).
I highly recommend both a pizza peel and a baking stone for this recipe. Totally worth it for this bread alone.
Once the baking stone has preheated long enough, carefully slide the parchment and bread onto the baking stone. Note: I have never had parchment paper catch fire in the oven using this recipe (or homemade pizza), but take care that the parchment doesn’t touch the heating element or sides of the oven. Also, I think the thinner/cheaper the parchment paper, the more chance this could happen.
You can put a broiler pan on the bottom of the oven and add 1-2 cups hot water OR you can toss a few ice cubes onto the bottom of the oven right after sliding the bread onto the stone and then quickly (but gently) close the oven door. The steam from the water is going to help create that beautiful crust.
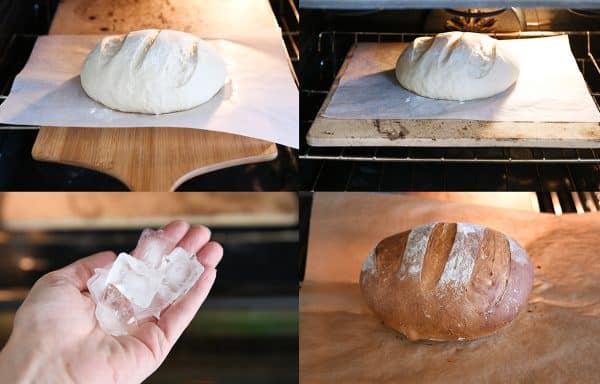
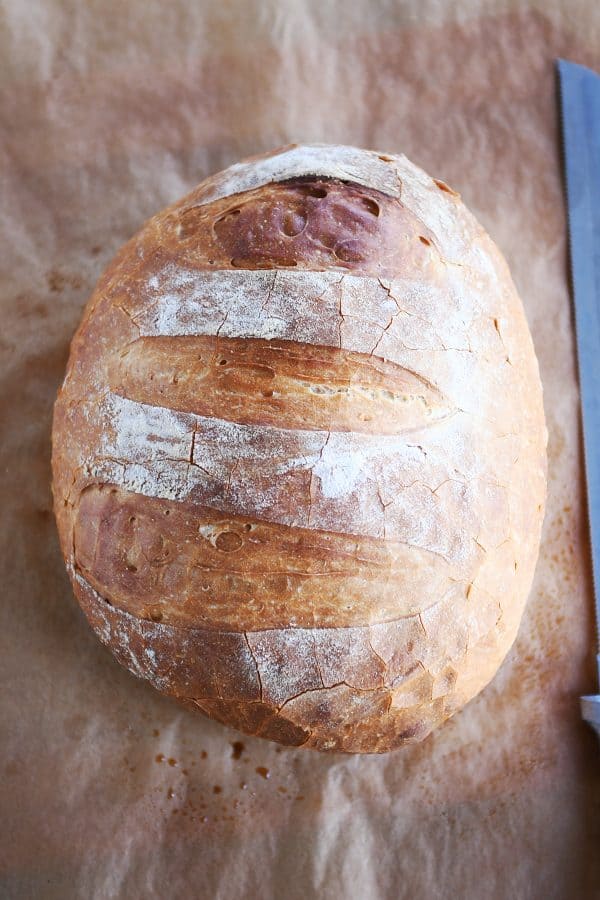
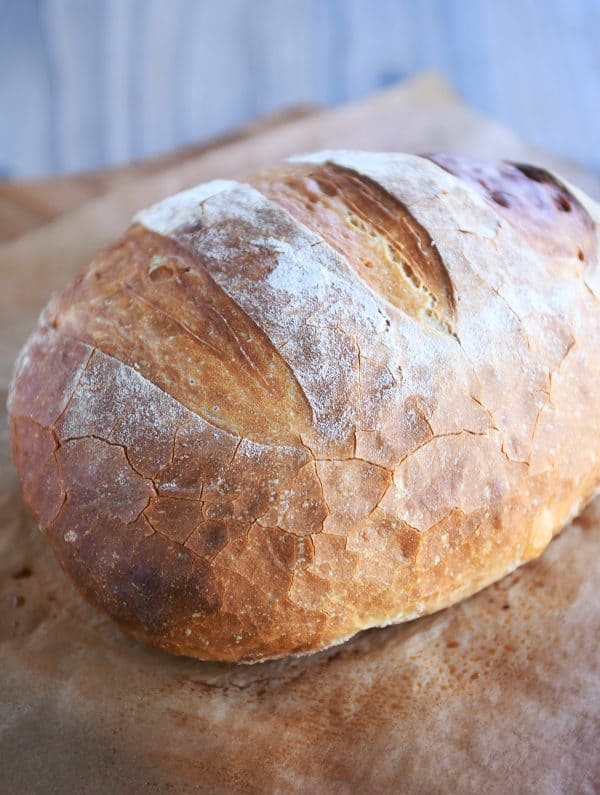
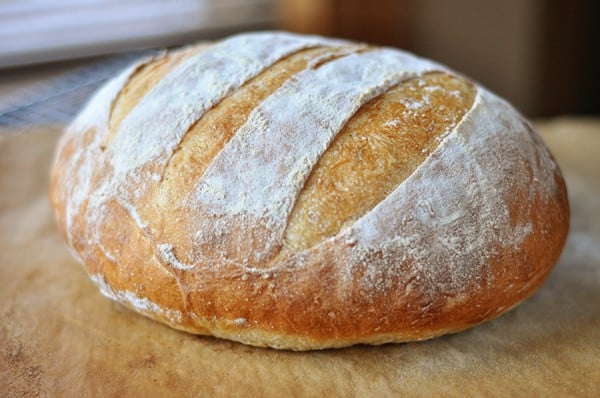
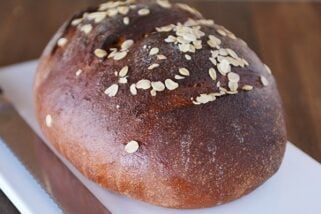
Bake the bread for about 25 minutes, give or take. It’ll puff even more in the oven. Look at that golden crust! Wowser.
This rustic crusty bread is my go-to bread to take to new neighbors, friends in need of a pick-me-up or when I am taking dinner into someone, and I make it several times a month just for our family to enjoy. It really is a life changing recipe.
I hope you’ve been able to see just how easy it is to make! I have no doubt you’ll feel like a total bread making rock start after you make this rustic crusty bread!
Equipment for Rustic Crusty Bread
While this bread doesn’t require a stand mixer, I’ve found the following to be helpful, especially if you want to ensure perfect crusty bread every time! Affiliate links for the products below.
- Baker’s lame (for slashing the bread)
- Parchment paper
- Pizza paddle/peel
- Baking stone
- Best inexpensive, bread knife ever
- Optional: Danish dough whisk
Easy Rustic Crusty Bread
Ingredients
- 3 cups warm water, about 100 degrees
- 1 ½ tablespoons instant yeast
- 1 tablespoon salt, I use coarse, kosher salt
- 6 ½ cups (923 g) unbleached, all-purpose flour, plus more for dusting dough (see note)
Instructions
- In a large bowl mix yeast and salt into 3 cups lukewarm water (about 100 degrees). Stir in flour, mixing until there are no dry patches. Dough will be quite loose. Cover lightly with a kitchen towel but don’t seal the bowl airtight. Let the dough rise at room temperature 2 hours (or up to 5 hours).
- Bake at this point or refrigerate, covered in an airtight container, for as long as two weeks. When ready to bake, cut off a grapefruit-size piece with serrated knife (I have only ever made two loaves out of the batch of dough so I just divide the dough in half to form my first loaf). Turn the dough in your hands to lightly stretch the surface, creating a rounded top and a lumpy bottom. Put the dough on a piece of parchment paper set on a pizza peel or a rimmed baking sheet turned upside down.
- Slashing: you can dust the top of the dough lightly with flour and slash now (before rising) or wait until after the loaf has risen. I’ve found waiting and slashing the dough after rising can sometimes cause the loaf to collapse, so after making this bread for years, my preferred method is to dust the top of the loaf lightly with flour at this step, before rising, and slash the top with a baker’s lame or sharp knife 3-4 times.
- Let the dough rest for 40 minutes for room temperature dough; if you have used the dough out of the refrigerator, let it rest for 1 1/2 hours. Repeat with remaining dough or refrigerate it.
- Place a broiler pan on the bottom rack of the oven (if you don’t have a broiler pan – no worries! Tossing 5-6 ice cubes in the bottom of the oven when you put in the bread works really well, too). Place a baking stone on the middle rack and preheat oven to 450 degrees. Heat the stone at that temperature for 20 minutes before baking.
- After the dough has rested and is ready to bake, if you haven’t already (see step #3), dust the dough lightly with flour, slash the top with serrated or very sharp knife three times.
- Slide the dough (with the parchment paper) onto the baking stone. Pour one cup of hot water into the broiler pan (or toss 5-6 ice cubes in the bottom of the oven) and shut the oven quickly but gently to trap the steam. Bake the bread until well browned, about 24-28 minutes. Cool completely.
Notes
Recommended Products
Recipe Source: adapted from The New York Times via Jeff Hertzberg’s Artisan Bread in Five Minute a Day
Recipe originally published February 2012; updated May 2019 with new pictures, recipe notes, commentary.


we made this today for the 2nd time. Added a bit more flour than it called for and baked in 2 bread pans rather than a loaf. If you make it in a bread pan I recommend during the last 10 min of cooking you take it our of the pan and let it cook on a heated cookie sheet to make the whole loaf crustier. Great tasting!
First time trying this recipe and the two loaves came out great!!
My question is how do I store it?
Thanks!
I let it cool and then store in a bread bag at room temperature (or freeze – but don’t store it in the refrigerator).
This is only the third time I’ve made homemade bread and the bread was very easy. It does make a huge amount of dough. I made two loaves separately. Second loaf days later and it was just as good as the first loaf maybe even better thank you for sharing the recipe. It was so easy and fantastic. The whole family loved it.
Loved it!! Very easy made two loafs separately it taste just as good with the dough a couple days later that’s the one thing it definitely makes a huge amount of dough. I think next time I might try to cut it in half, but the bread was absolutely fantastic. The whole family loved it. I couldn’t make a ball too well cause it just would ooze so it was slightly a short bread, but it tastes fantastic.
This is our favorite bread. It’s so simple to make & i love that it doesn’t take a long time to prepare so I can make it more last minute. It has a lot of flavor for not a lot of proof time.
This recipe was awful..”..way too sticky . Followed the recipe exactly and it was no where near these illustrations. I’m deleting it!!!!!!!!
I highly recommend trying again!! I have made this dozens of times and given to friends and family and get nothing the the most rave reviews!! Don’t be afraid
To add more flour if needed. This is my husband’s most favorite bread ever and it’s sooooo easy!
You must have miscounted your scoops of flour or added to much water. This recipe just as written results in a tacky recipe. Tacky is not the same as sticky. You need a tackiness to allow the dough to rise efficiently.
No sugar? Is that right?
Correct. There is no sugar called for in this recipe.
This dough was so sticky to worth with. I’m highly disappointed.
It’s ok to add more flour if needed. Trust me, this bread is sooo worth it and sooo easy! It’s a favorite every time I make it! My family doesn’t love sourdough but they devour this bread!
It was easy and delicious! I ended up making 3 loaves and using a cast iron pan with water in the oven.
This is the best and least complicated bread I’ve tried in a very long time. Did not need any “changes to make better”.
Thanks for your recipe.
Variations for using active dry yeast?
These days active dry yeast is formulated so it can be used interchangeably with instant yeast and doesn’t need to be proofed first, however, you can dissolve active dry yeast, if using, in a 1/4 cup warm water and let it bubble before using (decrease the water in the recipe by 1/4 cup if doing so).
This bread is so simple and delicious, I baked one loaf the first day and am saving the other to bake another day. Thank you for sharing this wonderful recipe!
I looked through all comments and didn’t see any discussing high altitude so thought I would. I live at just over 6000 feet. I made this today with the ingredients as written. The only thing I did differently is that I halved the rise times (I watched it and stopped it and noted how long it had been). I did use bread flour and it turned out perfectly.
I made the bread yesterday. Yay, Mine looks just like the picture, Easy and delicious. The recipe is a keeper. Thank you.
I tried this recipe this morning for the first time. Wow! Amazing flavor. It’s hard to believe how good this is with only 3 ingredients and water and so easy. It’s a keeper recipe.
So easy and tasty! I felt so fancy serving this with homemade soup for dinner.
This bread is a revelation! I’ve been making it about once a week for a year now, it always hits the spot and works like a dream.
When you say 100 degrees, is it Fahrenheit? Which would be about 68 Celsius for those of us not in the US? My initial inclination when reading a recipe is Celsius but then my brain kicks in and reasons that boiling water (100 C) would kill the yeast.
Yes, the temperature is for Fahrenheit; sorry for the confusion.
So delish and such a great recipe to try while experimenting with baking. My son is off to college this fall so we have started a tradition of making bread on sundays together while he’s still home. Starting with this recipe was so fun! (And delicious!) Thanks!
Thank you SO MUCH for this recipe. I legitimately gave up on trying to make homemade bread my husband always said it was too dense or undercooked and I tried so many recipes plus the bread machine… I just wanted a decent homemade bread and this is not decent it’s freaking delicious! This is my third half loaf and if I could make one possible suggestion for anyone who finds the loaf spreading when it rests. I used just the outside of my spring form pan greased to help it rise upwards. On my first loaf I tried taking the spring form part off and it made it fall somewhat. My second loaf I let it rise in the Dutch oven and set that on the pizza stone which was ok. So theirs try I’m doing the spring form upper part again this time I left it on to bake taking if off around 15 minutes (it slid off beautifully without opening the clasp) and it came out amazing. Thank you so much again really I’m so happy I came across this recipe it restored my confidence to bake bread!
So good and so easy! My loaves turned out so beautiful! Just like your photo Mel! I weighed the flour but think next time I’ll just use my measuring cup and fluff the flour as a measure (my final dough was really sticky so I had to add a bit more flour). To others…Don’t make the mistake I did…in an attempt to keep my counters clean, I turned my dough out onto parchment paper; what a mess!
My family loves this bread so much. I tend to make it more during the colder months and when my family heard it was on the menu for this snowy day, they all proclaimed their happiness to have it back in the rotation.
Thank you for sharing so many good recipes and helping to make our mealtimes a success!
Delicious and amazing! No need to ever knead again!
Can this bread be made with spelt flour? If so, does the recipe need to be modified?
I haven’t made it with spelt so I’m not sure. Sorry! Good luck if you experiment.
The recipe has an error. The given weight of flour is right at 923 gm. but that is eqal to about 7 1/2 cups flour – not 6 1/2 cups as stated.
Hi David, I test all my recipes using 142 grams per cup of flour, so the flour weight of 923 grams is correct (for 6 1/2 cups flour). Other sources may use a different weight amount – I recommend using the weight given in a recipe that has been tested.
This was the first bread recipe I ever tried. Since then I have tried many others but nothing compares to this recipe!! I now bake it every weekend. When I make Italian, I always add some rosemary and garlic, dip it in olive oil and WOW!!. Thank you for this recipe. I am now off to make some bread and then I am going to make the apple oat muffins (it’s a cold day in Maine, great for baking your delicious recipes!!).
Dang so good. I need to shape better etc but it tastes amazing. Used half white flour and half King Arthur whole wheat
I came here to say I followed the recipe (have made many of your recipes and love!), but also experienced my Pamper Chef pizza stone completely cracking and breaking apart. 🙁 Assuming it’s the moisture from the ice cubes since I’ve used it many times otherwise.
It’s possible your stone already had a fracture in it. I have been using my Pampered Chef stones for this recipe for a couple of years now and have never had a problem.
If you have a “menards” near you, buy one of their cheap ones they sell back in appliance area. My pampered chef stones all only lasted a year or two each. The cheap one from menards 12 years now and gets used a couple times a week.
Is it possible to freeze some of. Dough?If so at what point would you do that
I have only ever frozen this after it’s been baked and cooled.
I made this recipe yesterday. It is by far the best no knead bread I have made. I can’t believe that such a fine bread can be made in under 4 hours, thank you for a great “ keeper” recipe. Regards from Australia, Bill.
I have been using this recipe for 7+ years now and it comes out perfectly every time! Thank you! It was my first Pin! I have also made tiny personal sized loaves with it. My husband and daughter are big fans!
Love this recipe, have always had great success with it 🙂 do you have a suggestion on measurements if I had wanted to add cinnamon and raisins to it?
I haven’t tried that, so I’m not totally sure – maybe 1 cup of raisins and 1-2 teaspoons cinnamon?
Hi Mel,
I have used this recipe and LOVED it! The loaves came out perfect! Now I am trying, trying again, and now 3rd time trying to make a different recipe for rosemary bread… Can other ingredients be added into the dough and also sprinkled on top of this recipe or will that throw off the dough texture and bake?
To be clear, the rosemary bread recipe I am trying (multiple times without success) is not yours. I got it from a different source and it is refusing to rise no matter how much I try. Since I know that your recipe works for me every time, I was hoping I could just make additions to this dough and stick with your recipe?
Whoops! 3rd comment on my thread, I should really write out a full and complete comment/question the first time, shouldn’t I?
I just realized you do have a rosemary bread recipe on your site and the ingredients/steps are almost identical aside from scale measurements to the one I keep trying. I was worried that it was the addition of sugar and melted butter and the rosemary etc that was keeping my loaves flat. This rustic bread recipe works without fail and is much simpler, do you have a tip for adding in rosemary (or roasted garlic, or olives, or other added ingredients) to this specific rustic bread recipe?
Hi Hailey, you can add chopped rosemary at the beginning when mixing up the dough. I haven’t tried it with heavier add-ins like olives, but because this bread isn’t kneaded, I’d suggest using add-ins during the initial mixing.
Okay at this point I’m discouraged. I’ve tried this batch three times now each time with new suggestions and it just completely deflates. I was hopeful on this last batch until it came to after the second rest. Scoring before the second rest is recommend in the recipe so that’s what I did. Dough structure completely fell. Cracking on the bottom of the bread while it’s in the oven because since the dough fell so much in the second rise, it doesn’t even look like it was scored when you uncover it. And I used a bread lame.
Sorry this recipe is proving to be frustrating for you, Jamie. You may not want to try again, but if you do, make sure the dough isn’t rising too long after shaping. If it over rises, it will deflate much more easily. Also, you can dust and score before it rises/puffs – the scoring won’t be as pronounced as if it was scored right before baking, but that can help with the deflation.
Scoring before as instructed caused it to be worse and cracked at the bottom. At this point no matter what I do the form of the dough doesn’t hold. Added more flour in the beginning, didn’t change anything. I’ve tried this now 4 times. I probably let it rise too long but at this point I can’t try again. Very frustrating.
This also happened to me it’s not that it deflates it spreads out to much in the 40 min rest period. I’ve made bread for years,so it’s not like I don’t know what I’m doing. I’m going to try a loaf pan then it can only rise up instead of to the side. There is nothing to hold it to keep in from spreading to the side.
I had the same problem the first time or two I made this. I started doing my second rise in bowls. I use an 8 or 10 cup bowl with parchment in it then slide it out of the bowl and put it in the oven immediately. They do spread out a little, but not too much and come out as a beautiful round loaf. I also don’t usually bother with scoring it. It doesn’t have the same aesthetic,but it’s still nice enough.
First time making bread and I landed on this recipe. I know this is a good one especially based off the reviews and maybe this is because it was my first time, but for some reason when I was shaping my dough and then placing on the parchment paper, it’s structure fell a bit going from round with some height to oval and for lack of a better term, deflated. What am I doing wrong? I want to give this recipe a fair shot.
Hi Jamie, the dough is stickier than more traditional bread doughs, so it can be a bit different to handle and work with. Lightly greasing your hands can help shape the loaf – also, make sure the loaf is pinched on the bottom to create a taut loaf. If the dough is sticky enough to continue deflating instead of holding it’s shape, you can also try adding another 1/4 to 1/2 cup flour.
Thank you! I tried adding more flour in one of the batches and the same thing happened but I’ll try pinching the bottom
Can you substitute whole wheat flour for white?
I’ve substituted 50% whole wheat flour with good results.
If you don’t have a pizza stone, you could also use a cast iron skillet turned upside down..
This is now our go to recipe! It’s so simple to put together and turns our perfectly every time. My family loves your rosemary bread, but this one has taken the top spot now!
Can I half the recipe to only make 1 loaf??
Yes
I just pulled the bread out of the oven and they look awesome. I compared your instructions to a couple of others and went with yours because it was the easiest. Your instructions were fantastic and I thank you for the recipe!