Grilled Pizza {How To}
You can still enjoy hot homemade pizza during the no-oven summer months with grilled pizza! Check out this post for a grilled pizza how-to.
Mmm. I love me some grilled pizza. I’ve waxed poetic several times about homemade pizza.
It is our Saturday night fare and we look forward to it all week. But in the hot summer months, I never feel like cranking my oven up to an obscene 500 degrees F. So out to the grill we go!
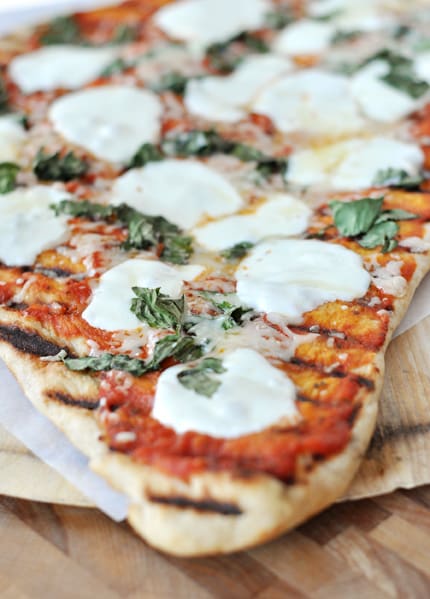
We’ve been grilling pizza for several summers now and to be honest, Brian, my husband, far prefers it that way.
I always have to break his little heart in January (and February and March and April…) when it is way too cold and tell him the oven will have to suffice for pizza-making through the winter.
My love only goes so far and definitely does not include freezing my bejeebers off to make grilled pizza.
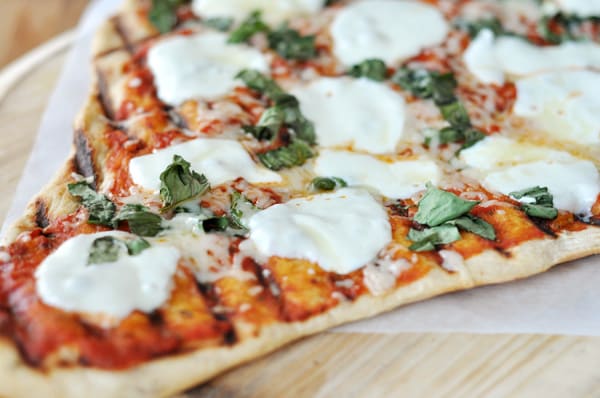
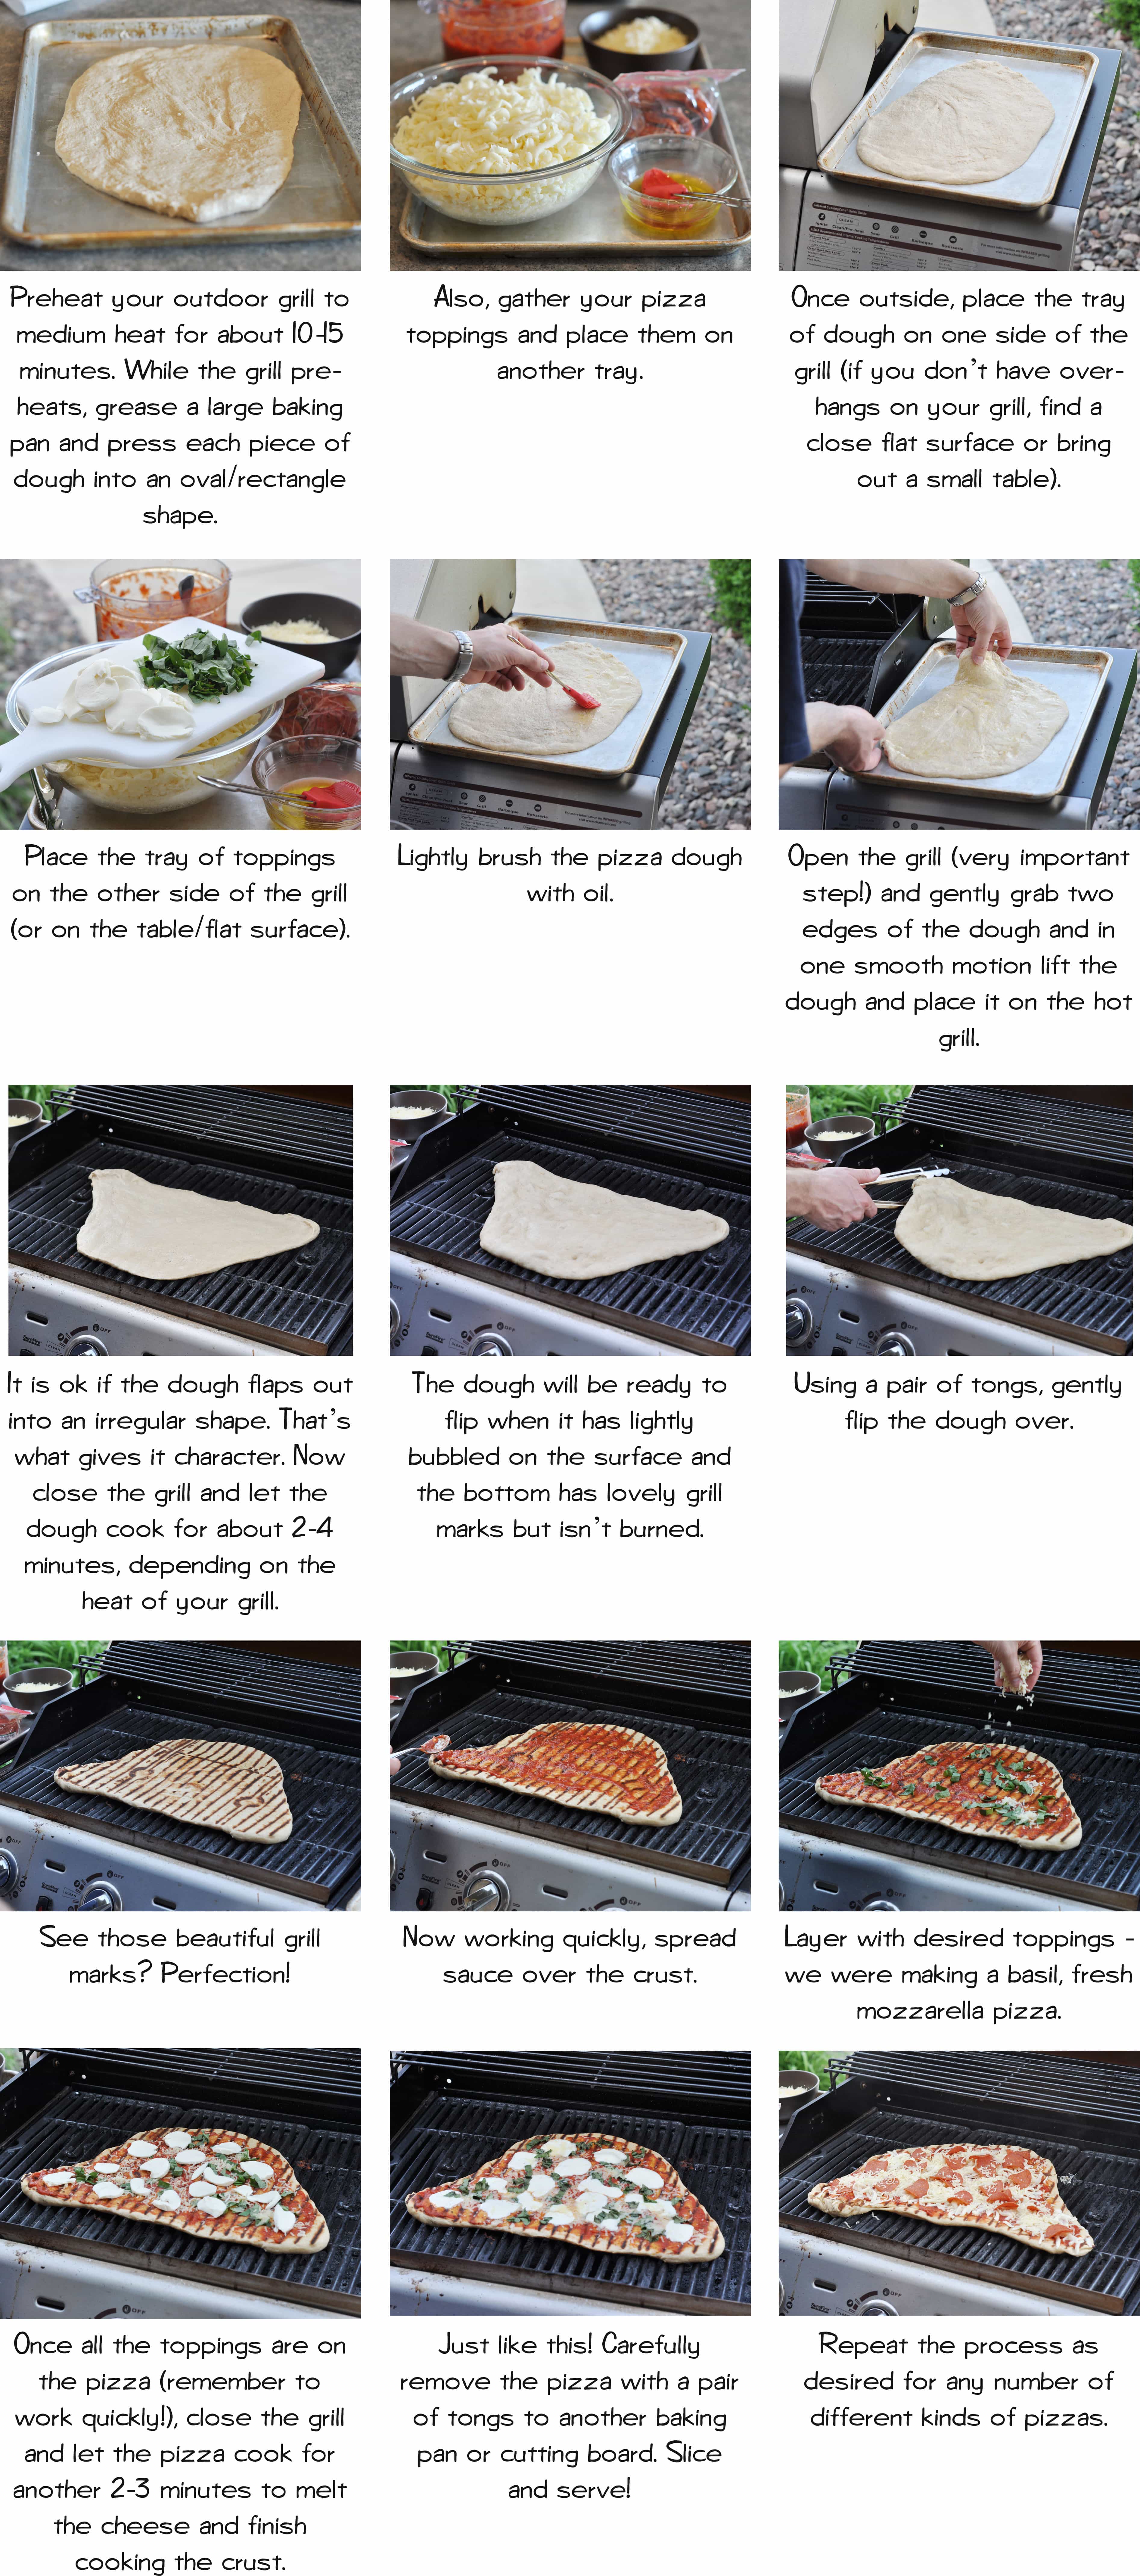
Grilled pizza is more about method than anything and is much faster and easier than I first thought when I initially tried it years ago. I’ve included the step-by-step photos of the process below but here’s what you need to start:
1) A grill: I use a propane gas grill but if you are handy with a charcoal grill, by all means, use that. You need a grill with a lid that can be closed to help the pizza toppings melt.
2) Pizza dough: I love this overnight pizza dough (Update: perfected overnight whole wheat pizza dough recipe) and make it 99% of the time but this fast and easy pizza dough (Update: new post on fast and easy pizza dough) is fantastic in a pinch, too. Make up your favorite batch of dough and separate it into pieces of dough that when pressed out will fit on your grill.
3) Pizza sauce: This is my favorite pizza sauce recipe and is simple to boot. Mix up a batch and have it handy.
4) Toppings: We keep our pizzas pretty simple around here. Usually there is the kid’s classic: sauce, mozzarella cheese, turkey pepperoni and fresh Parm, and then I like to make either this pesto chicken pizza or a pizza margherita (basically fresh mozzarella, fresh basil and some fresh Parm with the tomato sauce).
5) Oil/Brush: You’ll want a small bowl of extra virgin olive oil or canola oil or the like and a small brush or other device to rub a light coating of oil on the first side of the pizza dough that will come in contact with the grill.
Once you get prepped, you are ready to go!
Click HERE for a printable PDF version of the steps below and the recipes I use.
Now, go grill some pizza!
{UPDATE: I haven’t edited the how-to pictures below but another option for grilling the pizza which we’ve used a time or two is that instead of grilling the pizza directly on the grate, you can heat your pizza stone, if you have one, right on the grill, and it makes the process even easier – if you do that, no need to oil the dough before putting it on the stone.)



Found a pizza stone in my garage and made this recipe on the bbq for dinner tonight.
Great flavor and those instructions were spot on!
Since I don’t have a pizza stone, can I instead use a cast iron pan on the grill?
Do you think I could grill the one side of the crust and then freeze it in a 2 gallon ziplock bag for a few days? Then I would thaw it and finish the cooking process?
Sounds like a great idea!
I’ve had this on my sights for several months now to attempt on a day when I’m feeling domestically brave. Today was the day! My husband and I tag-teamed it, and we’ll definitely do it again. The pizza was amazing, we had a blast together, and it was a hit with the toddler and one-year-old! When it was all said and done, my husband said, “This was a lot of fun. Where’d you get the idea?” Mel. 🙂 “We owe her a lot!” Yes we do! Thanks for a fun night, Mel!
Yay, Annie!
I’ve bookmarked and tried SO many of your recipes with consistently great results. I tried googling “grilled pizza recipes” with no great results before remembering your blog. Sure enough, great tutorial. Thanks so much for your work putting this together. At 100 degrees here today, this will be our dinner tonight as we’re all sick of BBQ’ed meats!
I was gonna try this out today, but I’m wondering, do you miss out on the crunchy browning of the pepperoni and other ingredients by putting it on the grill?
Marci – the top of the grilled pizza doesn’t get quite as browned and golden as a pizza baked in an oven but it still should crisp up nicely around the edges.
Thank you for the great instructions and pictures! Tried this last night for the first time, I did the prep and my husband grilled, and it was so yummy!!! I was worried my 3 year old wouldn’t like the grill marks, but he gobbled it up! Thank you 🙂
Hi Claire – I’m sorry the pizza didn’t turn out how you were hoping! Without knowing exactly what kind of grill you have, the dough slipping through the grate could be due to the grate being larger than mine and what you pointed out – the dough needing more flour. I’d definitely try for a bit stiffer dough (but still able to stretch) and see if that helps. Also, if your dough was much darker, turn down the grill heat. Each grill can differ in temperature and you can play with the heat to get the crust nice and golden brown. I’ve never grilled them on the top rack because the top rack on my grill isn’t big enough and I like the direct heat to crisp up the crust. I’m not sure they would cook up the same way without being right on the hot grate. I hope you have better luck if you try it again! Oh, and I actually think it’s easier to grill smaller pizzas – it’s a bit simpler to flip them (but you may not have to cook them as long as a larger pizza).
AH I am so not good at this. haha I felt adventurous doing it, but grilling the dough was so hard for me, maybe you can tell me what I could have done better. I made one batch of your “quick dough” and instead of grilling one big pizza I split it into two smaller ones and grilled those one at a time – is it easier when you are grilling a large portion of dough? The biggest problem was just that my dough would droop between the grates, it wouldn’t just sit on top very nicely…so maybe I needed more flour in my dough to keep it firm? It also got a lot darker (blacker) than yours, which I don’t totally mind but still. Your directions were great, just wondering if I could do anything different on my end. Not to mention, our grill is nothing fancy, just a tiny gas grill from Walmart – not a nice tall one with a large grilling space. However, it does have a top rack. Have you ever grilled them on the top rack? Sorry for the lengthy comment!
I have been hesitant to try grilling pizza because it seemed like so much work. Thanks to your tutorial, I gave it a try and I’m now a believer. It was so delicious and less work than making it in the oven. Plus…the crust! Perfectly cooked! My daughter said we should have this pizza every other night this summer, and I am inclined to agree with her. Thanks!
Mel,
I really like that you gave 2 options for an overnight and a fast recipe. I used the fast one and my family loved it.
I wrote a post about our grilled pizza and linked back to you.
Thanks!
All summer I’ve been wanting to make my pizza on the grill but do not have a grill pan for pizza, so am I ever glad to see your post! Only a few weeks of grilling season left, so I’m definitely going to try your method! thank you so much! I may have to learn to let my dough be thicker instead of making it super thin like I do in the oven, but i’m so looking forward to trying it on the bbq. 🙂
I made this tonight for dinner. Thanks for the step-by-step. It really helped. So good!
Grilled pizza
I love how you put it right onto the grill. I need to up my dough ant-y quite a bit. We have not always had the best relationship but I have not given up!!! haha
Just wanted to let you know that I LOVE your blog. Everything I’ve made is absolutely scrumptious! Thanks for the best recipes section. It’s nice to have a tried-and-true recipe that you can count on for those favorites like spaghetti and chocolate chip cookies. Thanks for your talents!
I have been wanting to try grilled pizza for ages now, but I have been to scared. We use your fast and easy pizza dough and your pizza sauce recipes all the time and LOVE them. With heat indices in the 110+ range here in NC, this may save our “Friday night pizza night” ritual. Thanks!
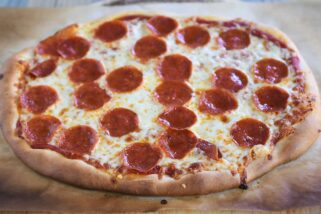
what are the toppings on the pizza in the picture?? what kind of cheese is that? 🙂
Mallory – one pizza is pepperoni, the other is a margherita pizza (fresh basil, fresh mozz and parmesan cheese).
Ohh Mel, once again you save the day (and my summer) I made this for dinner last night with your quick and easy dough. My husband said that it was the best pizza he has had in a LONG time. Luckily your recipe made 2 pizza’s because I burned the first one 🙂 BUT once I figured out my grill the second one was divine. THANK YOU FOR SHARING YOUR WONDERFUL TALENTS WITH ME, it makes my families life so much easier!
Every time you post something about grilling, I want to be in Texas where my grill is! This looks so good. Another month and I’ll be back and can have no excuses now.
I’m putting this one the menu! Thanks!
This tutorial is great. I’ve tried to make grilled pizza before but definitely have a lot to learn. Thanks!
I’ve been wanting to make grilled pizza for so long! Thanks for sharing this, it should be a piece of cake now! I’m going to post a link to this tutorial on my blog, under “FOOD I NEED TO MAKE & EAT!”
Hey Miss Mel! Have a quick question for ya. When you call for a can of diced tomatoes in your recipes, do you include the juice in them? I usually just use my bottled tomatoes which will probably substitute great, but I’m not sure how much of the juice (if any) I need to add. Thanks!
You have been reading my mind! I have been wondering how to grill pizza for the last few weeks. I figured I could use my regular pizza recipes, but just not sure how to go about it! Thank you, thank you, thank you!
First of all…love your site! I’ve used a lot of your recipes. We make pizza on the grill all the time. In AZ you can pretty much make it all year! We finally broke down and bought a pizza peel. What a difference that makes! They are available to purchase from $8 to $14. I bought mine at a kitchen supply store. We make individual pizzas, so my husband takes out the first two crusts and slightly cooks them on both sides. He then brings those in and while we are putting the topping on those, he cooks the dough for the next two. When that dough it done, he can put on the topped pizzas and then the next set. It goes fairly quickly. We have thought about doing a party and we would just partially cook all the crusts, then as they were topped continue the cooking.
Let me tell you a little story. There once was a girl. This girl decided in a fit of insanity (and after 2 glasses of wine) that it would be a good idea to start a “cleanse” the next day which eliminated all carbs and cheese. You know, the stuff of life.
By around noon the next day she questioned her sanity. An hour later she and a friend commiserated on Twitter, claiming that this diet could kiss their a$$es.
Then the girl saw this post and it was confirmed that she was not meant to cut out carbs and cheese. Ever. Because then how could she enjoy something as abso-freaking-lutely perfect as this grilled pizza??
Yeah. I kinda took the long way there. Anyway, this looks phenomenal, and way to go with the step-by-step pics. Very helpful! Since I love grilling naan I’m sure I could make an attempt at this without burning anything down 🙂
Awesome!! Thanks for this; I love your site and come here daily for great ideas. Appreciate your efforts; your blog is clean, crisp, fun, and brilliant!
YUM! Can’t wait to try it. I have done this @ a friend’s home and loved it. They bought ceramic tiles at the local home improvement center and had them on the grill to put the crust on to cook. Also very tasty.
I just grilled pizza for the first time this past weekend and it was amazing! I was at first intimidated by it but soon discovered how easy it is.
Thank you for this post!!! I have wanted to grill pizza ALL summer but haven’t attempted it yet. Now I know how! : )
Hi Mel!
Thank you for showing us a wonderful step-by-step on grilled pizza! 😀
I always wanted to try pizza this way, we LOVE pizza in this household!!!
Too many complicated steps in my previous attempts, needless to say……….loads of mess and terrible results. 🙁
I really like your dough recipes. They sound like they will be fool-proof for me! LOL!!
Plan on trying both, but really liking the over-night recipe.
Have an awesome day! 😀
Thanks so much for posting this, I was just telling my hubs that I want to try grilled pizza this week!
I made grilled pizza for the first time just the other day, it’s delicious! I had the cookie sheet turned upside down and covered in cornmeal so that the dough could just slide off onto the grill. Worked like a charm!
I love the step by step pictures for this!!! Your pizza looks deeevine!!:)
YUM! My family loves grilled pizza, and I am going to try your over-night dough. I like to roll out individual pizzas and put the toppings out in bowls (aka pizza “bar”) . We grill the pizza dough and then everyone tops their pizza with what they love.
Mel- I have toyed with the idea of having a pizza party (for my usual crowd of 20-30 people), but it seems like too much last minute prep. Have you ever rolled the dough out into pizzas and then grilled them later in the day? I saw Ina do it on her show, and she stacked the pizza dough in between parchment paper and refrigerated it. My only concern is that the dough would rise and puff up (I like my pizza thin and crispy). Do you think I could freeze the rolled out pizza dough? Grilled pizza for a crowd that size seems impossible for the entree`, but perhaps as an appetizer? If you have any thoughts or tips I would love to hear them! I read The Café Sucré Farine tip about par-grilling the crust ahead of time, which sounds like it might work…what do you think? Do you think you could freeze the par-grilled crust ahead of time? Thanks, Mel!
Also, can I just say that your tutorials are the best, Melanie? I can only imagine how much time it takes for you to stop and take photos of each step, but thanks for doing that for us! 🙂
Kim – I’ve never rolled out my dough more than, probably, 30 minutes in advance. I was at a friend’s house once who rolled it out hours in advance and stacked it between sheets of parchment but when she went to peel off the top layer of parchment, all the dough had stuck to the pieces of parchment and it was a nightmare. It kind of scared me off from rolling it out in advance. I think if you wanted to try it, I’d lightly spray the parchment paper with cooking spray. If you like your pizza thin and crispy, I’d try your freezer suggestion, although, I’d probably freeze each layer independent of being stacked on each other and then stack them when they are frozen – just to prevent the sticking issue. It seems like a huge project to tackle for a crowd but it would be fantastic if it could all come together. I don’t know if I would freeze the par-grilled crust but I like The Cafe Sucre Farine’s tip also and if you had time in the morning or could delegate – could you pre-grill them then?
I was craving pizza and not wanting to turn on my oven. Thanks for this awesome tutorial! You are my favorite food blogger 🙂
Thank you for this. Seriously, thank you. I tried my hand at grilled pizza for the first time a few weeks back and it didn’t work as well as I’d hoped. These is a GREAT step by step!!
Love grilled pizza and your’s looks amazing! Sometimes I do the crust in the morning on the grill and then at dinner time just top the crust and pop in the oven or back on the grill for a short time. This is wonderful when we are having guests. thanks, Chris
I don’t got no grill. But I do love me pizza. We don’t make it in the summer, but we’re half way through!